This article will describe in detail how to set up Wireguard VPN on your server. It can be a virtual or private server - it doesn't matter so much.
This VPN Wireguard setup guide is designed for users who do not have much experience, so all the steps will be quite detailed and followed by screenshots.
Traffic passing via our tunnel will be encrypted, and the Internet will display the IP address of our VPN server, not the address of the provider through which we access the network.
It is supposed that you already have a VPS. If not, you can order it from us.
We will install the Ubuntu 22.04 operating system on our server. If you have a server with a different OS, then you can easily reinstall it following the instructions.
So, the server with Ubuntu 22.04 OS ready, now we connect to it via SSH. If suddenly you have not come across this protocol before, then an article in which this process is described in detail will help you. The second paragraph of the article is for Linux OS, the third is for Windows OS.
Set up Wireguard server
After a successful connection, I will write a few commands and a description of what they produce to understand the process:
We update the list of packages in the repositories
apt updateRenewal of packages themselves
apt upgrade -yInstall the wireguard package
apt install -y wireguardOur configuration will be stored in the /etc/wireguard/ directory, we need to enter the directory:
cd /etc/wireguard/We will need a public and private key for our server. We will generate them after setting the correct rights when creating files and directories with commands:
umask 077
wg genkey > privatekey
wg pubkey < privatekey > publickey
Now we set the rights for the private key:
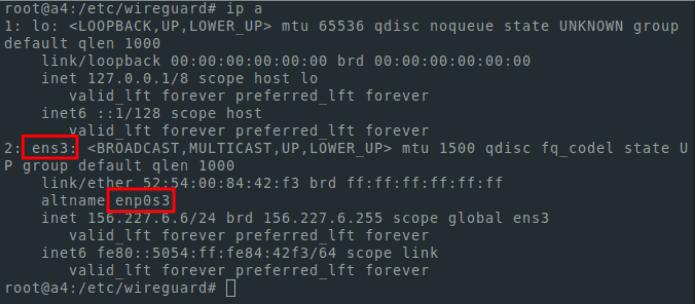
chmod 600 privatekeyBefore creating the configuration file, we need the name of our network interface. To discover it, use the command:
ip aWe need the interface with the IP address that is used for the current connection. It will probably be called ens3 in your case, but there may be another name.
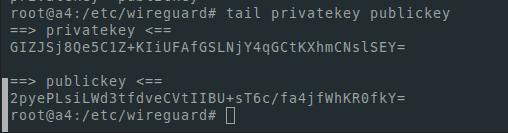
We will also need a public and private key. To display them I use tail
tail privatekey publickeyIt looks like this:
For editing, you can use any Linux text editor. I will use nano. To install it you need to run the command:
apt install -y nanoWe edit the configuration file:
nano /etc/wireguard/wg0.confNote
in order to save the file we use the ctrl+o button combination
for exit - ctrl+x
It should look like this:
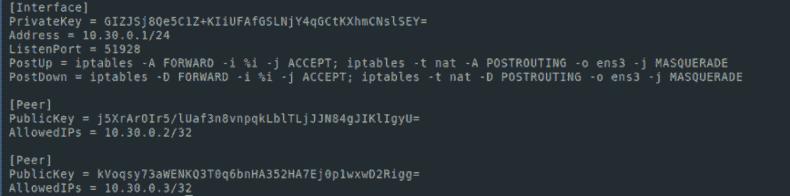
[Interface] PrivateKey = [ your private key ] Address = 10.30.0.1/24 ListenPort = 51928 PostUp = iptables -A FORWARD -i %i -j ACCEPT; iptables -t nat -A POSTROUTING -o [ interface name ] -j MASQUERADE PostDown = iptables -D FORWARD -i %i -j ACCEPT; iptables -t nat -D POSTROUTING -o [ interface name ] -j MASQUERADEIn my case it looks like this
We turn on ip forwarding
echo "net.ipv4.ip_forward=1" >> /etc/sysctl.conf sysctl -pLaunch wireguard service:
systemctl start [email protected]If we want the service to start after the server is restarted, then we do the following:
systemctl enable [email protected]For viewing the service status:
systemctl status [email protected]The status should be active as in the screenshot:

If you carefully followed our instructions, then at this stage, you have everything you need to make the server part of VPN Wireguard operate.
Setting up Wireguard client
The only thing left is to configure the client part. For example and simplicity, I will generate keys for the client part also on the server. But for security purposes, it would be more correct to generate keys on the client side.I use commands for generation:
wg genkey > mypc_privatekey wg pubkey < mypc_privatekey > mypc_publickeyI will also generate keys to use the VPN on the phone:
wg genkey > myphone_private keywg pubkey < myphone_privatekey > myphone_publickeyIt should be noted that all this is required to be done while being in the catalog
/etc/wireguard/
You can also run in another catalog. But for simplicity, we execute the instructions in /etc/wireguard/
We use the ls command to list the files in a directory. I got it like this:

Let's display the public keys on the screen. We will need them in order to add nodes to our network:
tail mypc_publickey myphone_publickeyFor me it looks like this:

Let's edit our config file:
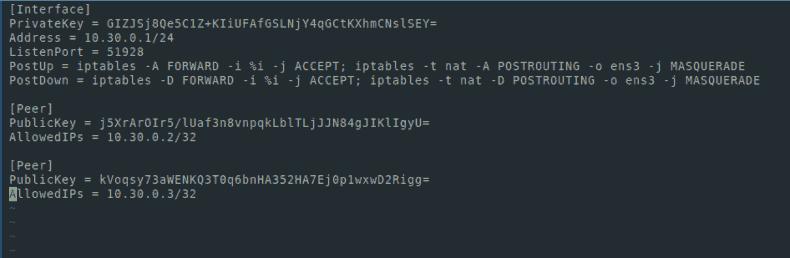
nano wg0.confAdd the following lines:
[Peer] PublicKey = [ mypc_publickey ] AllowedIPs = 10.30.0.2/32 [Peer] PublicKey = [ myphone_publickey ] AllowedIPs = 10.30.0.3/32Now the config file looks like this:
Save the file and restart our service:
systemctl restart wg-quick@wg0Let’s check that everything was successful:
systemctl status wg-quick@wg0The status must be active
Reloading the service is required every time after editing the server configuration file (wg0.conf)
Next, we will create configurations for clients (in my case, my PC and phone). I will do the same on the server.
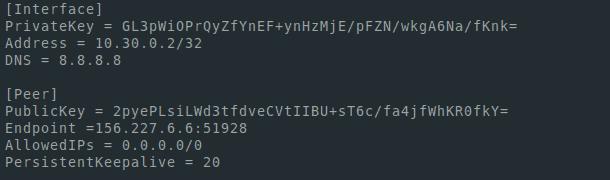
nano mypc.conf[Interface] PrivateKey = [mypc_privatekey private key] Address = 10.30.0.2/32 DNS = 8.8.8.8 [Peer] PublicKey = [publickey server publc key] Endpoint =[ server ip address]:51928 AllowedIPs = 0.0.0.0/0 PersistentKeepalive = 20In the Endpoint field, you can see the server's IP address - this is the IP address that we used to connect via SSH. To see the interfaces and addresses, you can use the ip a command.
Set up Wireguard for mobile
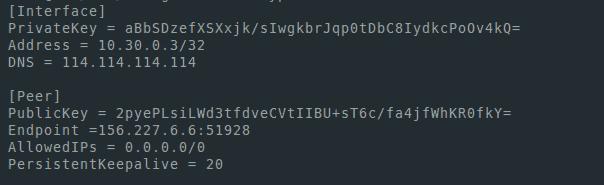
We create a similar configuration for our phone. Just need to change the address. For the PC it was 10.30.0.2/32, and in the configuration for the phone we will make 10.30.0.3/32. Also, if we want to use VPN on other devices, then we should add other addresses to the Address field in the configuration files and the wg0.conf server configuration file, the AllowedIPs field when creating configurations
Files look like that in my case:
mypc.conf
myphone.conf
For connection, we install wireguard client https://www.wireguard.com/install/
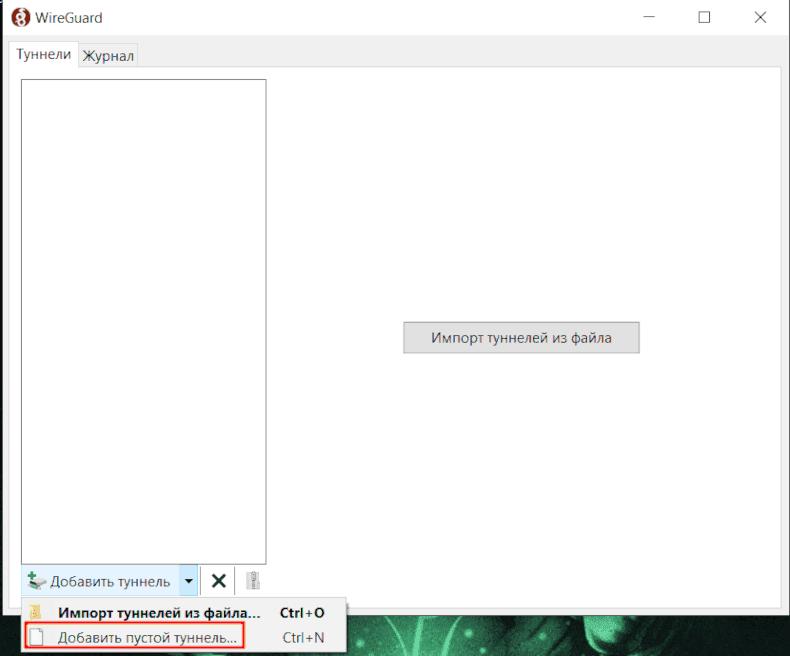
In the Windows application, we add a new tunnel and enter the configuration created in the mypc.conf file
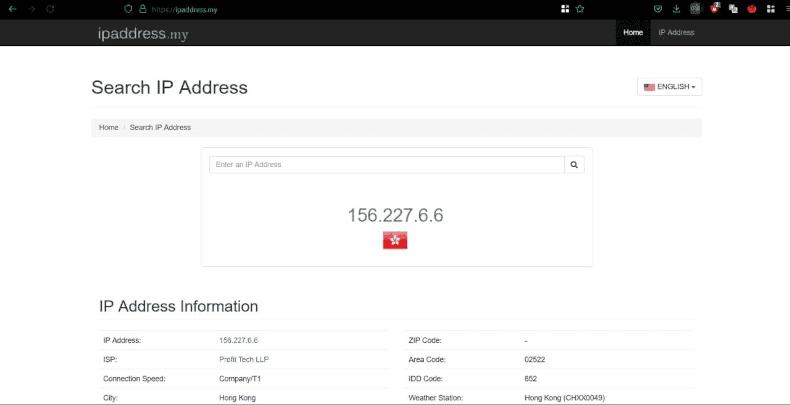
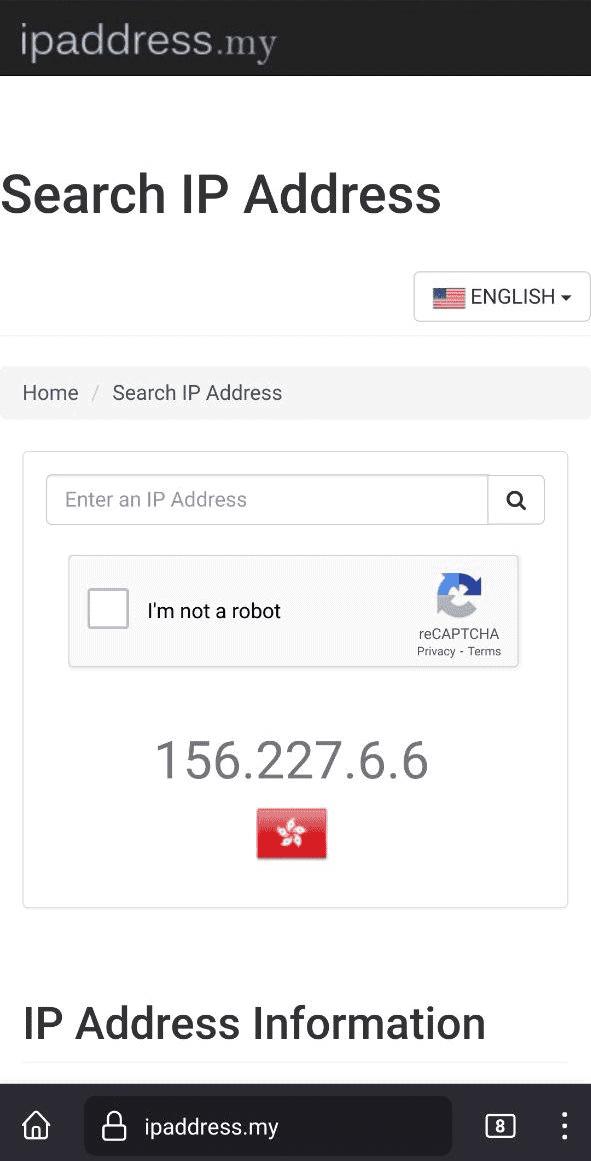
We launch the tunnel and go to the browser to the website that displays our address
In order to conveniently add a VPN to your phone, install a program for generating qr codes on the server:
apt install -y qrencodeBeing in theconfiguration directory, make the following step:
qrencode -t ansiutf8 -r myphone.conf
Then we enter the Wireguard app on the phone, press + to create a new tunnel, select scan the QR code, scan it, turn on the VPN. Next, we will check that we are displaying the address of our server by using any resource that displays the output IP address.

You did it!