


Shadowsocks is a lightweight, SOCKS5-based encrypted proxy protocol originally designed to get around traffic-shaping and blocking on ordinary networks. Unlike a full VPN, it only proxies the traffic an application explicitly sends to it, has almost no protocol overhead, and works well even on constrained connections. It doesn't try to mimic a real TLS handshake the way VLESS+Reality does — its strength is simplicity, wide client support (routers, phones, browsers), and very low latency, at the cost of being somewhat easier to fingerprint by traffic pattern on a heavily inspected network.
There are two actively maintained server implementations:
- shadowsocks-rust — the modern reference implementation from the shadowsocks organization, written in Rust. It supports the newer AEAD-2022 cipher family, is actively developed, and is the implementation this guide installs and configures in detail.
- shadowsocks-libev — the older C implementation. It's still maintained for bug fixes, ships as a ready-made apt package with its own systemd units, and is a good choice if you want the absolute simplest install with no manual binary handling. This guide covers it as an alternative installation path in Section 3.
This guide describes how to manually configure the server via the command line—without using a web panel or Docker. Wherever the "IP address" field appears, substitute it with your VPS's actual IP address.
What you'll need: a VPS running Ubuntu 22.04/24.04 or Debian 11/12, root access, your VPS's IP address, and a free UDP/TCP port (this guide uses 8388, the Shadowsocks default).
Don't have a server yet? See How to order a server and pay for it.
Comparing this against other self-hosted options first? See Xray VLESS Reality Guide for a TLS-camouflage-based alternative, AmneziaWG Server Deployment Guide for a WireGuard-based option, or Hysteria2 and TUIC setup for two other modern proxy protocols.
Connecting to the Server
Windows (PuTTY)
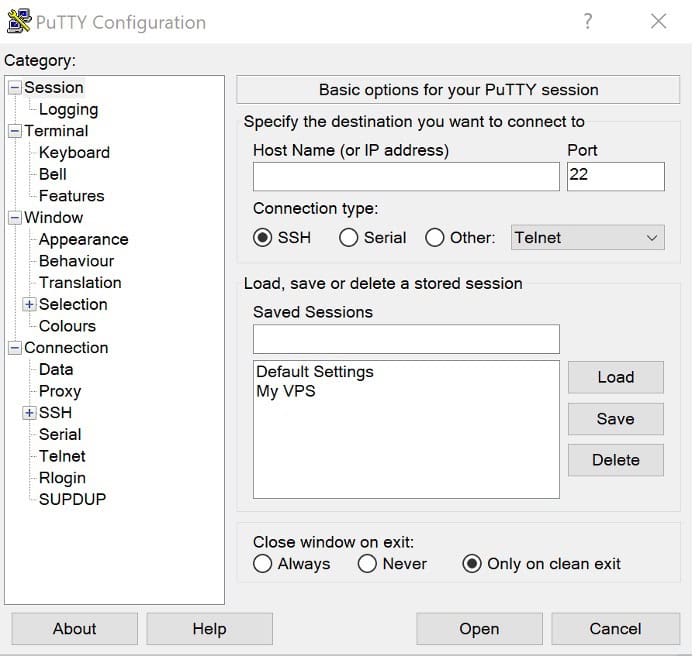
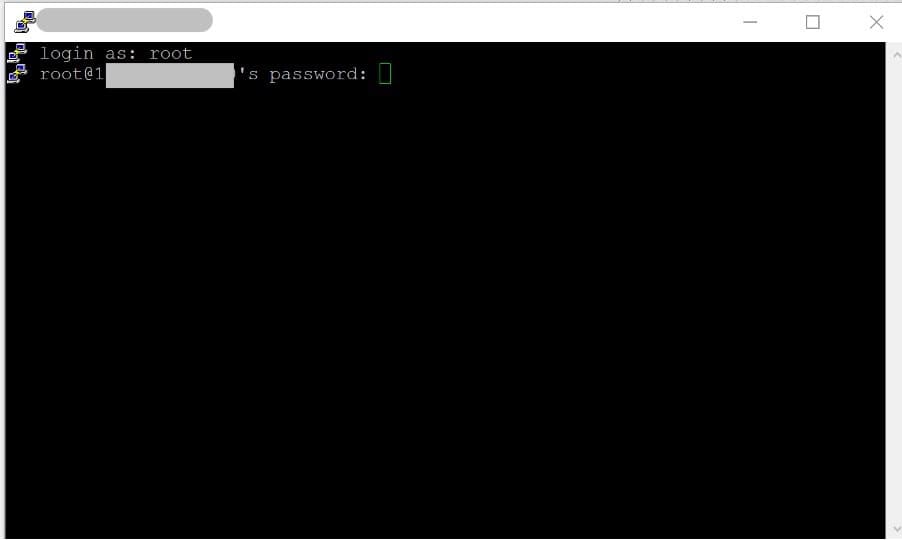
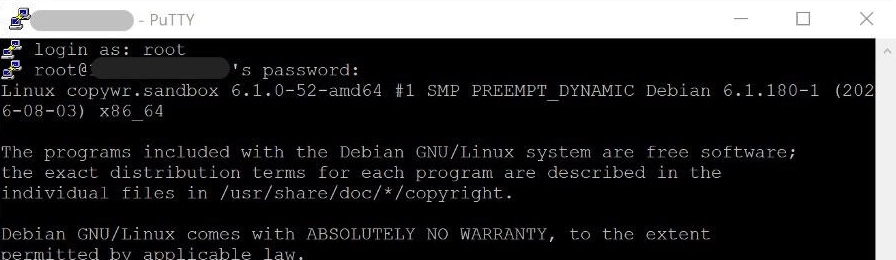
Open PuTTY, enter your VPS IP address in the Host Name field, set the port to 22, and log in as root using the password your VPS provider emailed you.
Server IP address: your IP address
login as: root
Password: your password
For a detailed walkthrough of connecting via PuTTY/SSH, see How to connect to a Linux server through SSH.
Linux / macOS (terminal)
ssh root@your_IP_addressAll commands below are run on the server, in this same SSH session — that covers Sections 2 through 7, plus the server-side checks in Section 13. Sections 8–12 (installing and configuring the client apps) happen on your own Windows/macOS/Linux/Android/iOS device instead, since that's the device the proxy needs to run on; each of those sections says explicitly which lines, if any, still touch the server.
Preparing the Server
Update the system
Before installing anything, refresh the package list and upgrade installed packages:
apt update -y && apt upgrade -y

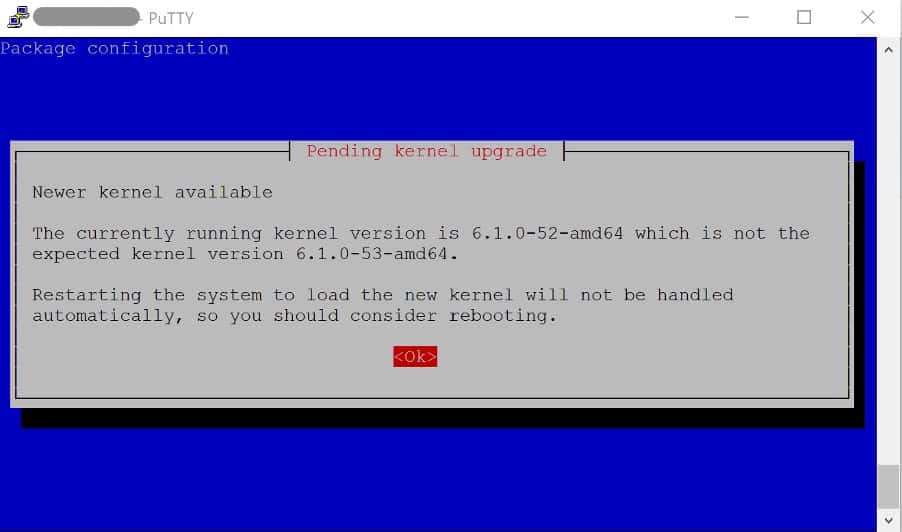
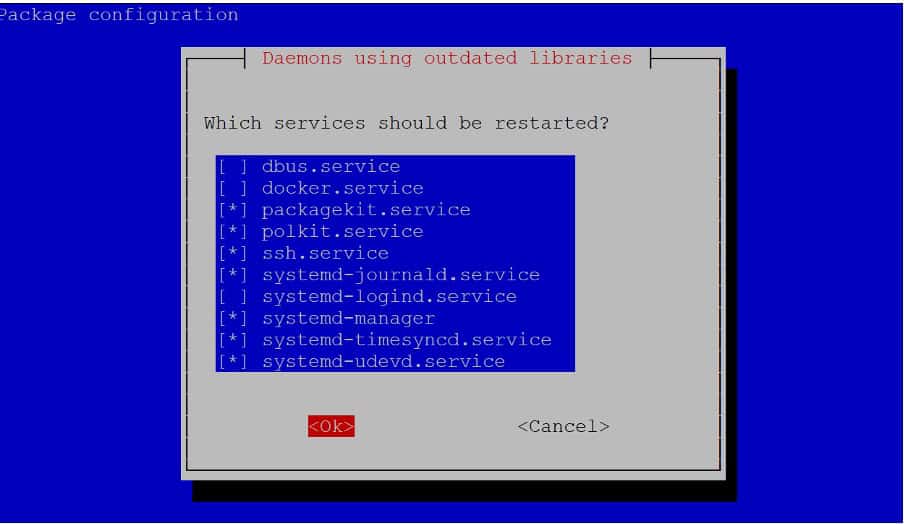
If this upgrades the kernel, a reboot is a good idea before continuing. (For a refresher on apt and how Linux package managers work, see Linux Package Managers.) Check with:
cat /var/run/reboot-required

If the file exists, reboot first with 'reboot', wait ~30 seconds, then reconnect.
Install the tools this guide uses
apt install -y curl wget tar xz-utils ufw qrencodecurl/wget and tar/xz-utils are needed to fetch and unpack the shadowsocks-rust release archive; ufw is the firewall configured below; qrencode turns the finished client link into a scannable QR code in Section 7.

Configure the firewall (UFW)
For more on UFW rules, see Configuring Firewall on Linux.
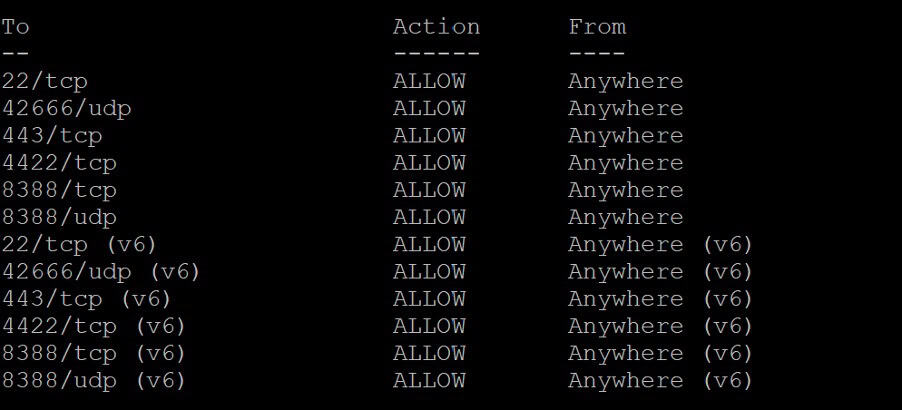
Open the two ports you'll need: 22/tcp for SSH (skip this rule and you risk losing access to the server) and 8388, both tcp and udp — Shadowsocks proxies both TCP connections and UDP associations (useful for DNS and some games/apps), so both directions of the port must be open.
ufw allow 22/tcp
ufw allow 8388/tcp
ufw allow 8388/udp
ufw --force enable
ufw status
All three rules should show as ALLOW in the ufw status output. If you later change the port in config.json, update these rules to match.
Installing the Server Software
Pick one of the two options below. Option A (shadowsocks-rust) is recommended: it's the actively developed implementation and supports the modern AEAD-2022 ciphers used later in this guide. Option B (shadowsocks-libev) is a fine choice if you'd rather use a plain apt package with a ready-made systemd unit and don't need AEAD-2022.
Option A — shadowsocks-rust (recommended)
Shadowsocks-rust doesn't ship an apt package with current releases, so it's installed by downloading the prebuilt static binary from the project's GitHub releases. Fetch the latest release tag from the GitHub API and download the matching Linux x86_64 archive:
SS_VER=$(curl -s https://api.github.com/repos/shadowsocks/shadowsocks-rust/releases/latest | grep -Po '"tag_name": "\K[^"]*')
echo "Latest version: $SS_VER"
cd /root
wget "https://github.com/shadowsocks/shadowsocks-rust/releases/download/${SS_VER}/shadowsocks-${SS_VER}.x86_64-unknown-linux-gnu.tar.xz"

If your VPS is arm64 instead of x86_64 (check with `uname -m`), replace x86_64-unknown-linux-gnu with aarch64-unknown-linux-gnu in the filename above.
Extract the archive and install the binaries system-wide:
tar -xf shadowsocks-*.tar.xz
install -m 755 ssserver ssservice ssmanager ssurl /usr/local/bin/
rm -f shadowsocks-*.tar.xz ssserver ssservice ssmanager ssurl sslocal 2>/dev/null
Verify the binary is in place and check the installed version:
ssserver --version
Create the directory the configuration file will live in:
mkdir -p /etc/shadowsocks-rust
This guide installs a fixed version rather than piping an installer script into bash. To upgrade later, re-run the two commands above with a fresh SS_VER lookup, stop the service, replace the binary, and restart it (Section 6).
Option B — shadowsocks-libev (alternative, apt package)
Shadowsocks-libev is included in Ubuntu's universe repository (Ubuntu 16.10+) and Debian's main repository (Debian 8+), so no third-party PPA is needed on 22.04/24.04 or Debian 11/12:
apt install -y shadowsocks-libev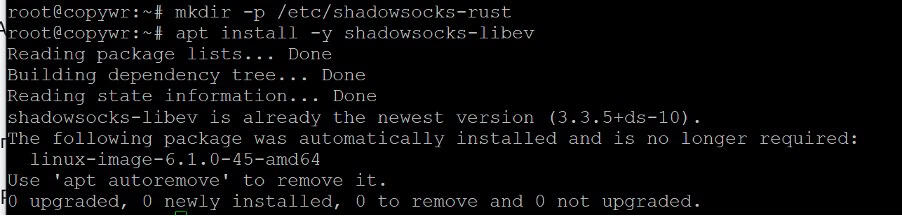
If apt reports the package isn't found, the universe repository is disabled; enable it and retry:
add-apt-repository universe && apt update && apt install -y shadowsocks-libevThe package installs its own systemd units (shadowsocks-libev.service for the default config, plus [email protected] for named per-instance configs) and creates /etc/shadowsocks-libev/config.json automatically — Sections 4–6 note the libev-specific commands and file paths alongside the rust ones. The rest of this guide's client sections (7–13) apply identically to either server implementation, since both speak the same Shadowsocks/SIP002 protocol on the wire.
Generating the Password and Choosing a Cipher
Shadowsocks authentication is a single shared password plus a cipher (encryption method) that both sides must agree on — there's no separate UUID, key pair, or certificate to manage.
Cipher families
- AEAD-2022 (recommended, shadowsocks-rust only): 2022-blake3-aes-128-gcm, 2022-blake3-aes-256-gcm, 2022-blake3-chacha20-poly1305. Newer design (SIP022) with stronger replay protection and support for multiple users sharing one port. The password must be a base64 string of exactly the cipher's key length (16 bytes for the 128-bit variants, 32 bytes for the 256-bit variant).
- Classic AEAD (supported by both rust and libev): aes-256-gcm, aes-128-gcm, chacha20-ietf-poly1305. Widely compatible with older clients and with shadowsocks-libev; the password can be any passphrase, since it's fed through a key-derivation function rather than used directly as key material.
This guide uses 2022-blake3-aes-256-gcm for the shadowsocks-rust server, since it's the strongest and most current option and every client recommended later (v2rayN, v2rayNG, Shadowrocket, Streisand, ShadowsocksX-NG) supports it. If you installed shadowsocks-libev in Section 3, use chacha20-ietf-poly1305 or aes-256-gcm instead, since libev does not implement AEAD-2022.
Generate a key (shadowsocks-rust)
ssservice genkey -m "2022-blake3-aes-256-gcm"
This prints a base64 string — that's your password. Copy it somewhere safe; you'll paste it into both the server configuration in Section 5 and the client link in Section 7.

Choose a passphrase (shadowsocks-libev)
For the classic AEAD ciphers used by shadowsocks-libev, any sufficiently long random string works, since it's run through PBKDF/HKDF rather than used as a raw key. Generate one with:
openssl rand -base64 32Writing the Server Configuration
Shadowsocks-rust
Open the configuration file for editing:
nano /etc/shadowsocks-rust/config.jsonPaste in the template below, substituting your own password from Section 4 (and the port from Section 2, if you changed it from 8388):
{
    "server": "0.0.0.0",
    "server_port": 8388,
    "password": "YOUR-GENERATED-KEY-HERE",
    "method": "2022-blake3-aes-256-gcm",
    "mode": "tcp_and_udp",
    "timeout": 300,
    "nofile": 51200
}
Press Ctrl+O (WriteOut) to save the file, Enter to confirm the file name, then Ctrl+X to exit nano.
The important fields: server listens on all interfaces (0.0.0.0); server_port is the port opened in Section 2; password/method are the credential and cipher from Section 4; mode enables both TCP and UDP relaying; timeout is the idle-connection timeout in seconds; nofile raises the file-descriptor limit for busy servers.
Validate the JSON and that the binary accepts it before wiring it into systemd:
ssserver -c /etc/shadowsocks-rust/config.json --help >/dev/null && echo "binary OK"python3 -m json.tool /etc/shadowsocks-rust/config.json >/dev/null && echo "JSON OK"Create the systemd unit (shadowsocks-rust)
The binary release doesn't ship a systemd unit, so create one:
nano /etc/systemd/system/ssserver.service[Unit]
Description=Shadowsocks-Rust Server
Documentation=https://github.com/shadowsocks/shadowsocks-rust
After=network.target
[Service]
Type=simple
ExecStart=/usr/local/bin/ssserver -c /etc/shadowsocks-rust/config.json
Restart=on-failure
RestartSec=5s
LimitNOFILE=51200
User=root
[Install]
WantedBy=multi-user.targetSave and exit as above, then tell systemd to pick up the new unit file:
systemctl daemon-reloadShadowsocks-libev
The apt package already created /etc/shadowsocks-libev/config.json with a default (loopback-only, random password) configuration and its own systemd unit. Open it for editing:

nano /etc/shadowsocks-libev/config.jsonReplace the contents with:
{
    "server":"0.0.0.0",
    "server_port":8388,
    "password":"YOUR-PASSPHRASE-HERE",
    "method":"chacha20-ietf-poly1305",
    "mode":"tcp_and_udp",
    "timeout":300
}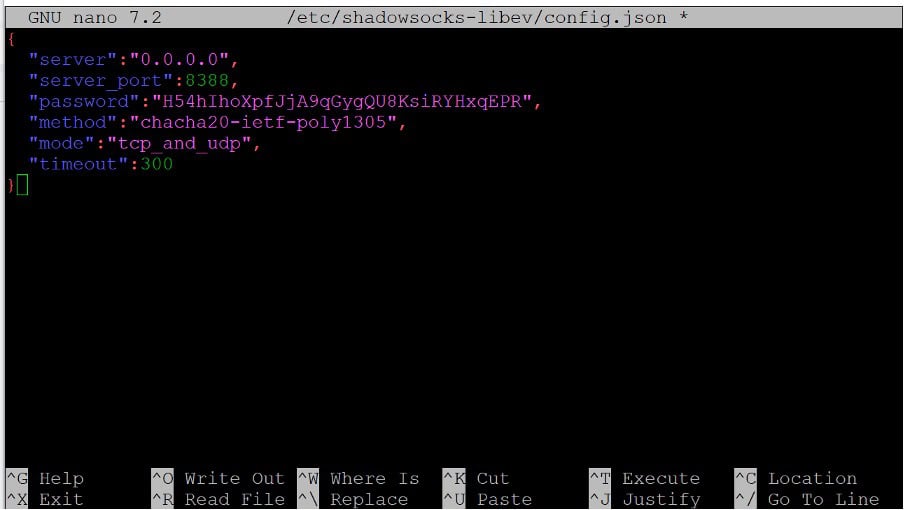
The default config uses server: ["::1", "127.0.0.1"] (loopback only); changing it to "0.0.0.0" is what makes the server reachable from the public IP — don't skip this if you copied the stock file instead of the template above.
Starting the Service and Enabling Autostart
Shadowsocks-rust
systemctl enable --now ssserversystemctl status ssserver --no-pagerStatus should show active (running). Confirm something is actually listening on the port (both protocols):

ss -lntp | grep ':8388'
ss -lunp | grep ':8388'
If the service fails to start, the fastest way to see why is the systemd journal (for background on reading Linux logs in general, see How to read Linux logs and where to find it):
journalctl -u ssserver -n 50 --no-pagerShadowsocks-libev
systemctl restart shadowsocks-libevsystemctl enable shadowsocks-libevsystemctl status shadowsocks-libev --no-pagerCheck the port and logs the same way as for shadowsocks-rust, substituting the service name:


ss -lntp | grep ':8388'
ss -lunp | grep ':8388'
journalctl -u shadowsocks-libev -n 50 --no-pager
Building the Client Connection Link
Shadowsocks clients import a single ss:// share link (the SIP002 URL format) rather than a config file. The link encodes the cipher and password as base64 in the userinfo portion of the URL:
ss://base64(method:password)@your_IP_address:port#labelBuild the base64 portion on the server (this avoids any typos from hand-encoding):
METHOD="2022-blake3-aes-256-gcm"
PASSWORD="YOUR-GENERATED-KEY-HERE"
USERINFO=$(echo -n "${METHOD}:${PASSWORD}" | base64 -w0)
echo "ss://${USERINFO}@your_IP_address:8388#My-SS-Server"
Example output (with placeholder key):

ss://MjAyMi1ibGFrZTMtYWVzLTI1Ni1nY206eHl6X2V4YW1wbGVfa2V5X2hlcmU=@your_IP_address:8388#My-SS-ServerThe text after # is just a display label you can rename freely in any client. For a shadowsocks-libev server, substitute METHOD="chacha20-ietf-poly1305" (or aes-256-gcm) and its passphrase from Section 4 instead.
Turn it into a QR code so mobile clients can scan it directly:
qrencode -o ~/ss-client.png "ss://${USERINFO}@your_IP_address:8388#My-SS-Server"Copy the PNG to your own computer with scp, run from your computer's terminal (or PowerShell on Windows), not the server:
scp root@your_IP_address:~/ss-client.png .Connecting from Windows
Everything in this section happens on your Windows PC, not over SSH — the client has to run on the device that will actually use the proxy.
Install v2rayN
v2rayN is a free, actively maintained GUI client with native Shadowsocks support alongside VLESS, VMess, Trojan, and others. Download the latest release from the project's page.
Grab the Windows 64-bit .zip asset (a self-contained build needs no separate .NET runtime as of recent v2rayN versions), extract it anywhere, and run v2rayN.exe.
Import the server
Copy the ss:// link built in Section 7 to your clipboard (or copy the QR PNG over with scp and open it), then in v2rayN choose Servers → Import bulk URL from clipboard (or scan the QR code via the built-in scanner). The new server profile appears in the list with the label you set after the #.
Right-click the profile and select it as active, then enable the system proxy (or TUN mode, for routing the whole machine) from the main window's toolbar.
Connecting from macOS
Everything in this section happens on your Mac, not over SSH.
Install ShadowsocksX-NG
ShadowsocksX-NG is the long-running native macOS GUI client for Shadowsocks; the current release line ships a native Apple Silicon build alongside Intel. Download the latest .dmg from the releases page.
Open the .dmg and drag ShadowsocksX-NG into Applications, then launch it — it appears as an icon in the menu bar.
Import the server
Copy the ss:// link from Section 7 to your clipboard, then click the menu-bar icon → Servers → Server Preferences → the + at the bottom-left, and choose "Import From Pasteboard" (or scan the QR code with "Scan QR Code From Screen" after opening the PNG). Select the new profile from the menu-bar dropdown, then toggle "Shadowsocks: On" and choose "PAC Auto" or "Global" routing mode from the same menu.
Connecting from a Linux Desktop
Everything in this section happens on your own Linux machine, not the VPS.
Install the local client
If you installed shadowsocks-rust on the server in Section 3, the same release archive contains sslocal, a SOCKS5/HTTP local proxy client. Download and install it the same way as the server binary (adjust the OS/arch suffix for your desktop if it isn't x86_64-unknown-linux-gnu):
SS_VER=$(curl -s https://api.github.com/repos/shadowsocks/shadowsocks-rust/releases/latest | grep -Po '"tag_name": "\K[^"]*')
wget "https://github.com/shadowsocks/shadowsocks-rust/releases/download/${SS_VER}/shadowsocks-${SS_VER}.x86_64-unknown-linux-gnu.tar.xz"
tar -xf shadowsocks-*.tar.xz
sudo install -m 755 sslocal /usr/local/bin/
Configure and run
Create a small local config listening on 127.0.0.1:1080 as a SOCKS5 proxy:
mkdir -p ~/.config/shadowsocks-rustcat > ~/.config/shadowsocks-rust/local.json << 'EOF'
{
"server": "your_IP_address",
"server_port": 8388,
"password": "YOUR-GENERATED-KEY-HERE",
"method": "2022-blake3-aes-256-gcm",
"local_address": "127.0.0.1",
"local_port": 1080,
"mode": "tcp_and_udp"
}
EOFsslocal -c ~/.config/shadowsocks-rust/local.jsonPoint your browser or system network settings at a SOCKS5 proxy on 127.0.0.1:1080. For a GUI, Nekoray or ShadowsocksX-Qt5-style forks can import the same ss:// link from Section 7 and manage sslocal for you instead of running it by hand.
Connecting from Android
Everything here happens on your Android device, not over SSH.
Install a client
Two good options:
- Shadowsocks for Android — the official client from the shadowsocks organization. Install it from Google Play (search "Shadowsocks"), or download the APK directly from the project's releases page if Play isn't available in your region.
- v2rayNG — the Android counterpart to v2rayN, supporting Shadowsocks alongside VLESS/VMess/Trojan; useful if you want one app for multiple protocol types.
Import the server
In either app: tap the + button, choose "Import from clipboard" after copying the ss:// link from Section 7, or "Scan QR code" and point the camera at the PNG. Tap the imported profile to select it, then tap the connect button. Android will prompt for VPN permission the first time — approve it to establish the tunnel.
Connecting from iOS
Everything here happens on your iPhone or iPad, not over SSH.
Install a Shadowsocks-capable client
Shadowrocket is the most widely used iOS client with Shadowsocks support; it's a paid app in most storefronts. Search for it in the App Store, or open.
Streisand is a free, open-source alternative that also supports Shadowsocks alongside VLESS, Trojan, and other protocols.
App Store catalogs vary by storefront/region and can change over time; if neither is visible in yours, search the App Store for "Shadowsocks" or "V2Box".
Import the server
Copy the ss:// link to your clipboard, open the client, and use its Add/Import from clipboard option, or scan the QR code from Section 7 with the client's built-in scanner. Toggle the new profile on; iOS will prompt for VPN-configuration permission the first time, which you'll need to approve via Face ID, Touch ID, or your passcode.
Verifying the Connection
With the tunnel active from Section 8, 9, 10, 11, or 12, go back to your own device (not the SSH session) and open any "what's my IP" checker in a browser — the address shown should match your VPS's IP address, your_IP_address.
To verify from the server side instead, check the systemd journal for connection activity and confirm established sessions on the port (use ssserver for the rust journal, or shadowsocks-libev for the libev journal):
journalctl -u ssserver -n 50 --no-pager
ss -tnp | grep ':8388'
Reference:
|
Field |
Value |
|
Address |
your VPS's public IP address |
|
Port |
8388 (the same port opened in Section 2) |
|
Password |
the key/passphrase generated in Section 4 |
|
Method |
2022-blake3-aes-256-gcm (rust) or chacha20-ietf-poly1305 (libev) — must match exactly on both sides |
|
Mode |
tcp_and_udp — enables both TCP proxying and UDP relay (DNS, some games) |
|
Plugin |
none used in this guide — Shadowsocks needs no SNI, certificate, or transport plugin to function |
Conclusion
Following this guide leaves your VPS running its own Shadowsocks server — either shadowsocks-rust with a modern AEAD-2022 cipher, or shadowsocks-libev from Ubuntu/Debian's own repository — as a systemd service that survives a reboot without any action on your part.
Adding more users:
- Simplest: generate a second password (Section 4) and run a second ssserver/shadowsocks-libev instance on a different port with its own config file and systemd unit, then repeat Section 5–7 for that port.
- shadowsocks-rust with an AEAD-2022 cipher also supports multiple users sharing one port and password-derivation key via the "users" array in config.json (Extensible Identity Headers, SIP022) — see the shadowsocks-rust README's Configuration section for the exact syntax if you need per-user traffic accounting on a single port.
A few habits worth keeping up once the server is running:
- Keep the server updated. For shadowsocks-rust, periodically re-run the download-and-install steps from Section 3 with a fresh version lookup, then systemctl restart ssserver. For shadowsocks-libev, plain apt upgrade covers it.
- Back up config.json somewhere private off the server. It holds every client's password; losing it means regenerating credentials for every device.
- Rotate the password if a device is lost or a client is compromised: generate a new one (Section 4), update config.json, restart the service, and rebuild the client link (Section 7) for every remaining device.
If the connection won't come up, check in order:
- the service status (systemctl status ssserver --no-pager, or shadowsocks-libev) and the journal (journalctl -u ssserver -n 50 --no-pager)
- the firewall rules (ufw status — the port must be open for both tcp and udp)
- that the port isn't already bound by another service (ss -lntp | grep ':8388' should show only ssserver/ss-server)
- that the password, method, and port in the client match config.json exactly — a single mismatched character fails the handshake silently, usually showing as a connection timeout rather than an explicit error
- that mode is set to tcp_and_udp on the server if the client needs UDP (DNS-over-proxy, some games/apps) and not just tcp_only
Comparing Shadowsocks against other options? See Xray VLESS Reality Guide for a TLS-camouflage-based protocol that's harder to fingerprint on a heavily filtered network, AmneziaWG Server Deployment Guide and How to set up Wireguard VPN on your server for WireGuard-based alternatives, or Hysteria2 and TUIC setup for two protocols built for lossy or heavily filtered networks. If you only need a simple proxy rather than a full tunneling setup, 3proxy configuration on CentOS/ArchLinuxis a much lighter alternative, and the older VPN server setup on Linux: PPTP or OpenVPN? covers protocols that are simpler to set up but far easier for DPI to detect and block. For general server hardening once the proxy is live, see Linux Users: Management and Permissions.
