More and more people are running their own VPN instead of relying on paid, ready-made services: it's cheaper, better for privacy, and gives you full control of the server. One of the most effective options for regions with aggressive network blocking is AmneziaWG, a protocol developed by the Amnezia project on top of WireGuard.
Classic WireGuard is fast and reliable, but it has a fixed packet structure and a predictable handshake, which DPI (Deep Packet Inspection) systems can reliably fingerprint and block. AmneziaWG solves this: it adds junk packets to the ordinary WireGuard connection, randomizes headers, and changes the size of handshake fields — so WireGuard's characteristic signature disappears and the traffic no longer stands out from ordinary UDP traffic.
Already running a classic tunnel and wondering if it's worth switching? Compare this against a plain OpenVPN/PPTP setup in VPN server setup on Linux: PPTP or OpenVPN?, or against vanilla WireGuard (no obfuscation) in How to set up Wireguard VPN on your server.
This guide sets up an AmneziaWG server by hand, without Docker or a web panel — the smallest possible footprint on the VPS itself, configured entirely from the command line. It's the lightest-weight option and works well on a budget VPS, since it needs no GUI, no database, and no reverse proxy. The example server below uses a placeholder IP address — replace it with your own VPS's address wherever it appears.
What you'll need: a VPS running Ubuntu 22.04/24.04 or Debian 11/12, root access, and your VPS's IP address. A domain name is not required — AmneziaWG does not use certificates, so there's nothing to renew and nothing for DPI to flag as a TLS handshake.
Don't have a server yet? See How to order a server
Connecting to the Server
Windows (PuTTY)
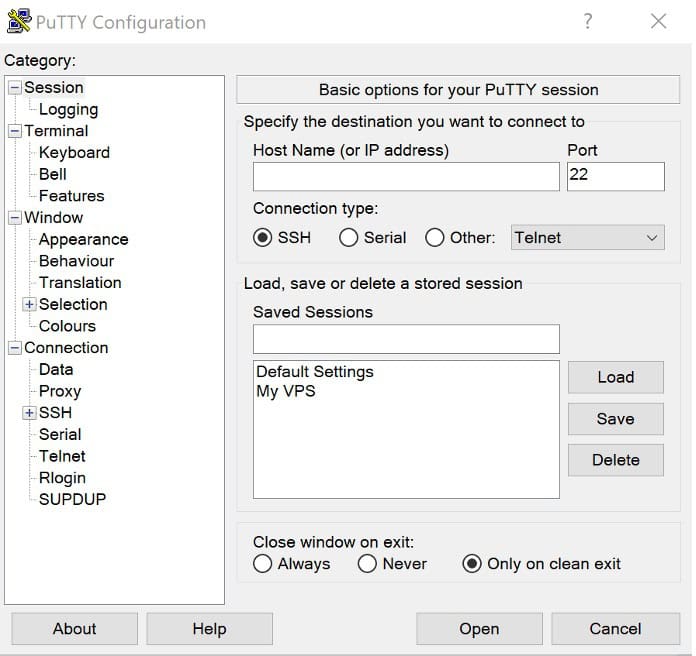
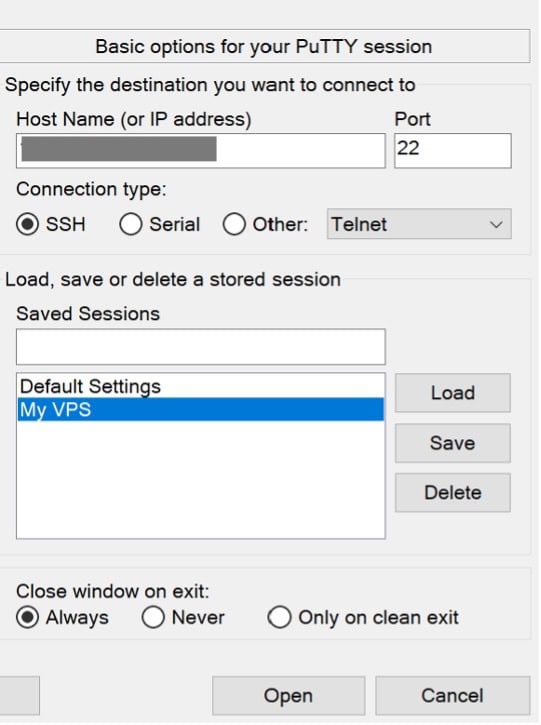
Open PuTTY, enter your VPS IP address in the Host Name field, set the port to 22, and log in as root using the password your VPS provider emailed you.
Server IP address: your IP address
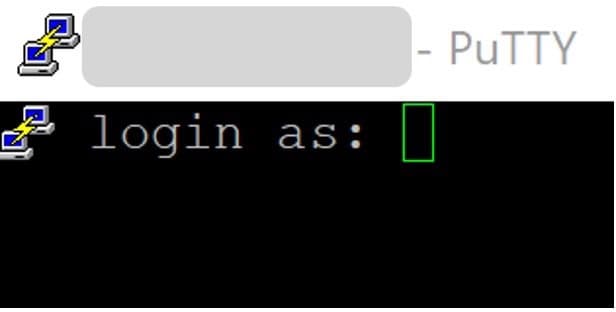
login as : root
Password: your password
1. Open PuTTY, enter your VPS IP address in the Host Name field.
2. Set the port to 22.
3. Enter log in as root.
4. Using the password your VPS provider emailed you.

The result should be as follows:
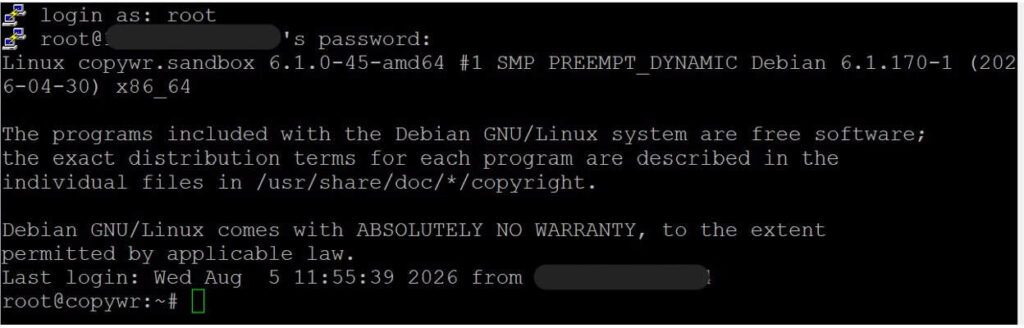
For a detailed walkthrough of connecting via PuTTY/SSH, see How to connect to a Linux server through SSH
Linux / macOS (terminal)
ssh root@YOUR_SERVER_IPAll commands below are run on the server, in this same SSH session — that covers Sections 2 through 5, plus the server-side checks in Section 9. Sections 6–8 (installing and configuring the VPN client) happen on your own Windows/macOS/Linux device instead, since that's the device the VPN needs to run on; each of those sections says explicitly which lines, if any, still touch the server.
Preparing the Server
Update the system
Before installing anything, refresh the package list and upgrade installed packages:
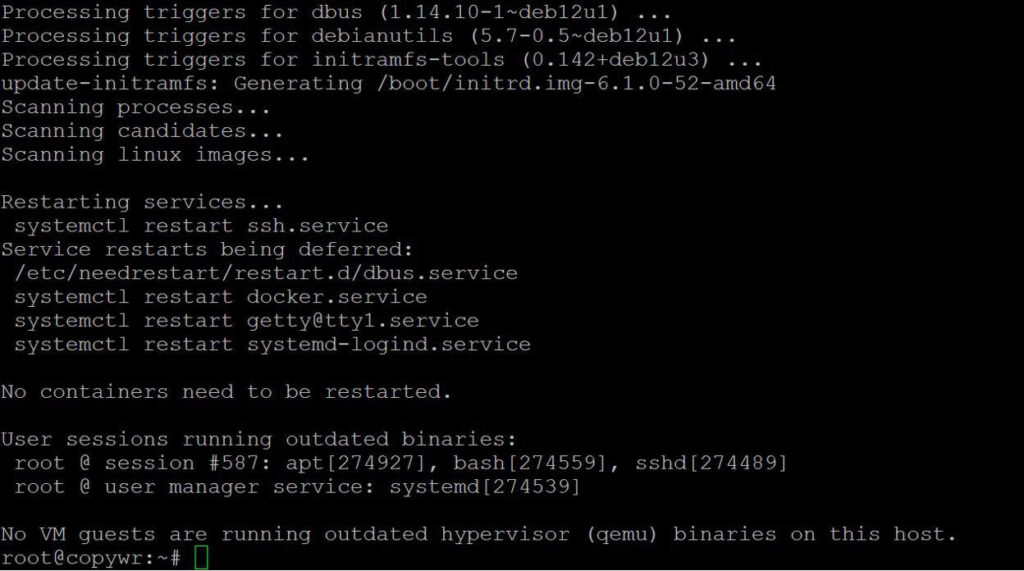
apt update -y && apt upgrade -yIf this upgrades the kernel, reboot before building the AmneziaWG kernel module in Section 3, otherwise DKMS may build against the wrong kernel headers and the module will fail to load. (For a refresher on apt and how Linux package managers work, see Linux Package Managers.) Check with:
cat /var/run/reboot-required
Enable IP forwarding
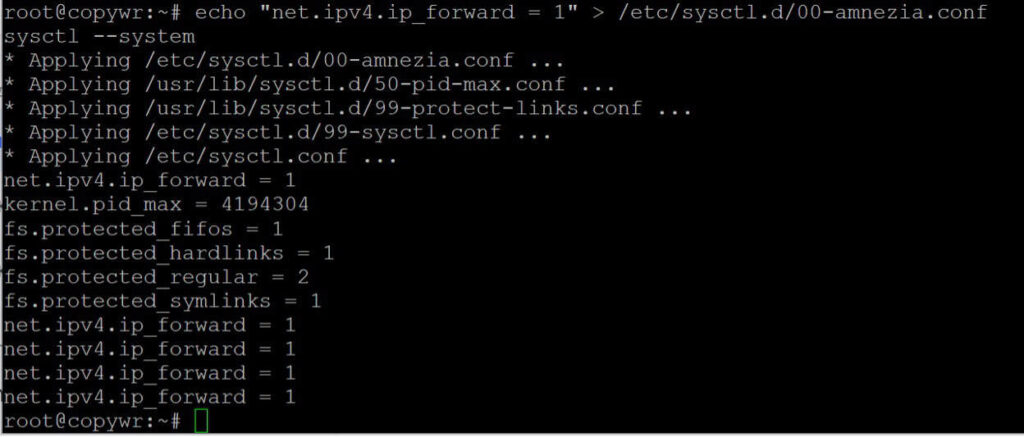
This setting lets the server forward clients' packets on to the internet — without it, the tunnel will come up but no traffic will pass through it.
echo "net.ipv4.ip_forward = 1" > /etc/sysctl.d/00-amnezia.conf
sysctl --system
The first command creates a dedicated config file; the second applies it without rebooting the server.
Configure the firewall (UFW)
For more on UFW rules, see Configuring Firewall on Linux
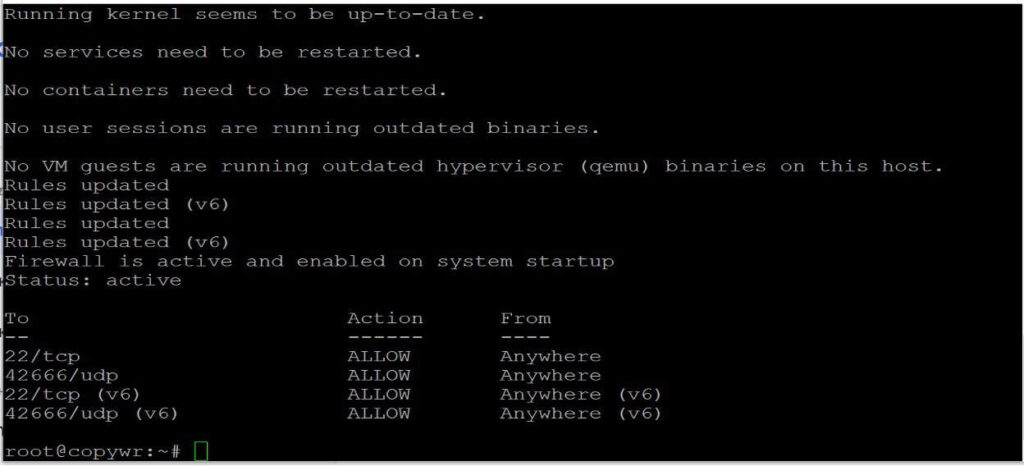
Open the two ports you'll need: 22/tcp for SSH (skip this rule and you risk losing access to the server) and 42666/udp, the port AmneziaWG will listen on.
apt install ufw -y
ufw allow 22/tcp
ufw allow 42666/udp
ufw --force enable
ufw status
Both rules should show as ALLOW in the ufw status output.
Installing AmneziaWG
Debian doesn't support Ubuntu-style PPAs directly, so the repository has to be added by hand rather than with add-apt-repository. This works the same way on Ubuntu.
Add the repository manually
echo "deb [arch=amd64] https://ppa.launchpadcontent.net/amnezia/ppa/ubuntu jammy main" > /etc/apt/sources.list.d/amnezia.listAdd the GPG signing key
Use a dearmored keyring file rather than the deprecated apt-key command, and fetch the PPA's real signing key (fingerprint 75C9DD72C799870E310542E24166F2C257290828):
apt install -y gnupg2
gpg --keyserver keyserver.ubuntu.com --recv-keys 57290828
gpg --export 57290828 | tee /usr/share/keyrings/amnezia.gpg > /dev/null
echo "deb [arch=amd64 signed-by=/usr/share/keyrings/amnezia.gpg] https://ppa.launchpadcontent.net/amnezia/ppa/ubuntu jammy main" > /etc/apt/sources.list.d/amnezia.list
Update and install
apt update
apt install -y amneziawg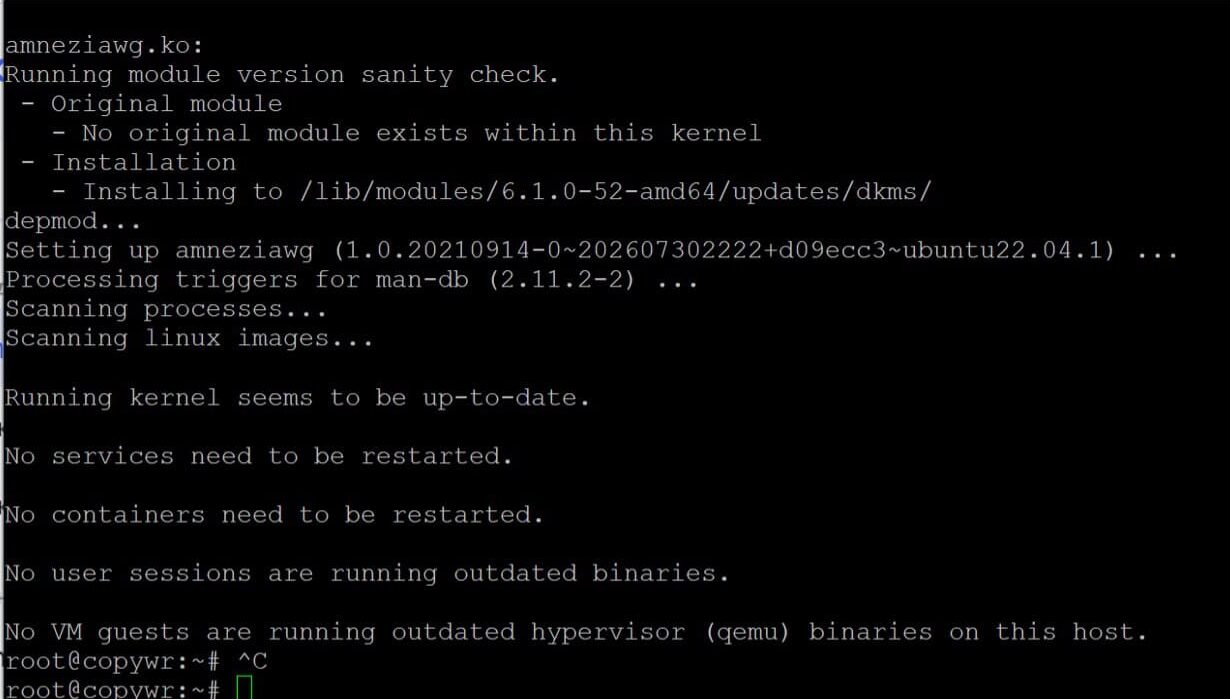
Verify the module loaded
modprobe amneziawg
lsmod | grep amnezia
Generating Server and Client Configuration
Install helper utilities
Install the qrcode dependency, then create a dedicated working directory and download the community config-generator script into it:
apt install -y python3-qrcode
mkdir -p ~/awg && cd ~/awg
wget -O awgcfg.py \
  https://gist.githubusercontent.com/remittor/8c3d9ff293b2ba4b13c367cc1a69f9eb/raw/awgcfg.py
If python3-qrcode isn't available on your distro's repos, fall back to pip3 install qrcode --break-system-packages (the flag is required on Debian 12+/Ubuntu 24.04, which block unmanaged pip installs by default). Don't run both installs — pick one.
Generate the server configuration
Create /etc/amnezia/amneziawg/awg0.conf. You can leave the tunnel's internal subnet and UDP port at their defaults or set your own:
python3 awgcfg.py --make /etc/amnezia/amneziawg/awg0.conf \
  -i 10.10.8.1/24 -p 42666
The -i flag sets the tunnel's internal network address and mask; -p sets the server's UDP port (the same one opened in step 2.3).

Create the client-config template
python3 awgcfg.py --createThis saves a template in the same folder that individual client configs are built from — it already includes the server's public key, its IP address, and the obfuscation parameters (Jc, Jmin, Jmax, S1, S2, H1–H4) that distinguish AmneziaWG from plain WireGuard.

Add clients
Create one entry per device — the name can be anything, e.g. the device name:
python3 awgcfg.py -a "laptop"
python3 awgcfg.py -a "phone"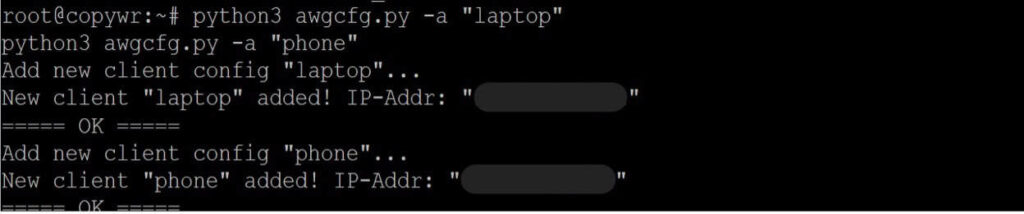
Generate client files and QR codes
python3 awgcfg.py -c -qThe ~/awg folder will now contain files like laptop.conf and phone.conf, plus matching PNG QR codes you can scan straight into a mobile app.
![Contents of the generated laptop.conf: the client's Address, DNS, obfuscation parameters, and the [Peer] section pointing back at the server.](https://profitserver.net/wp-content/uploads/2026/08/15_7-1024x582.jpg)
The ~/awg folder will now contain files like laptop.conf and phone.conf, plus matching PNG QR codes you can scan straight into a mobile app.
Starting the Service and Enabling Autostart
Bring up the awg0 interface and enable it to start automatically on reboot:
systemctl enable --now awg-quick@awg0
systemctl restart [email protected]
systemctl status [email protected]
Status should show active (exited) with the unit enabled at boot. If the console appears to “hang” showing logs, press Q to exit.
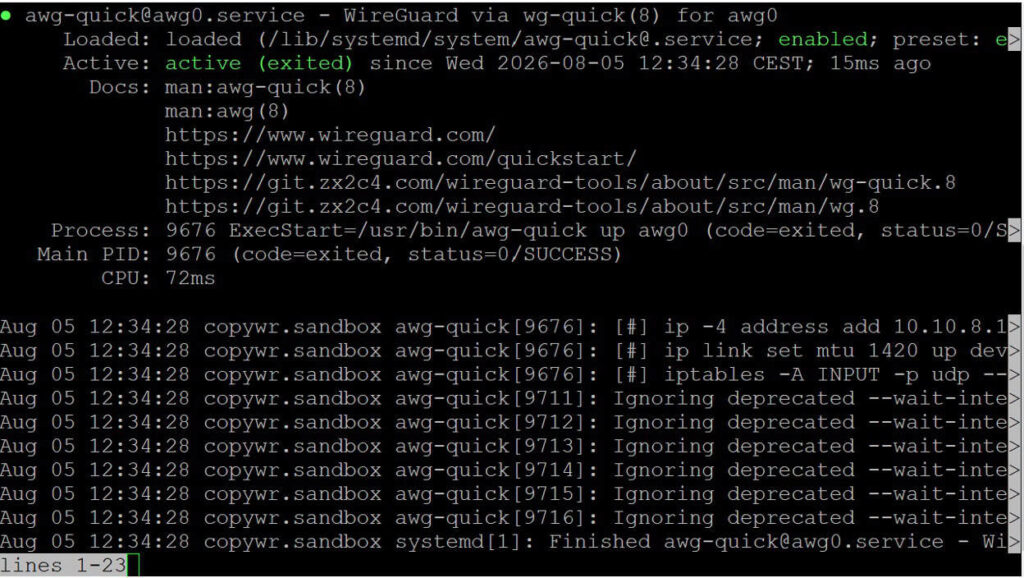
Check the list of active peers and per-peer traffic with:
awg show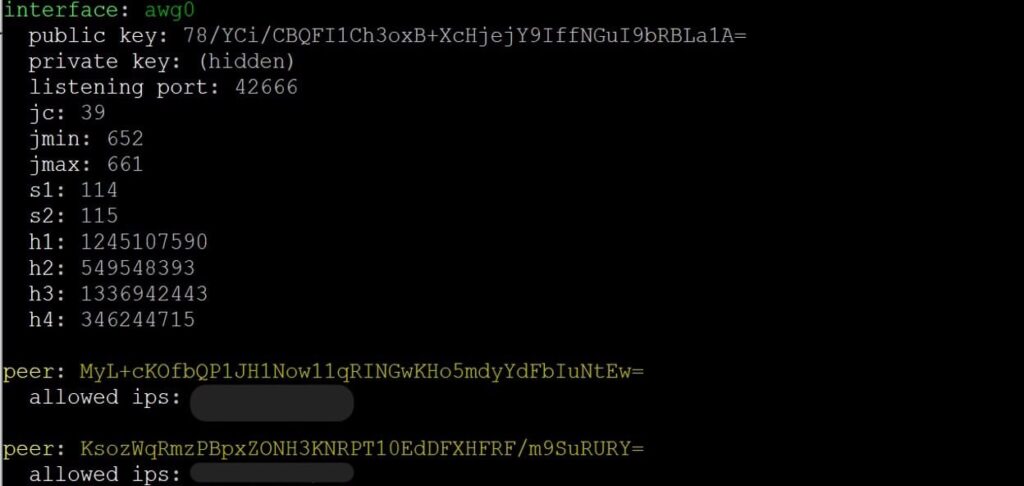
Connecting from Windows
Everything in this section happens on your Windows PC, not over SSH — the VPN client has to be installed on the device that will actually use the tunnel. The only step that touches the server is the scp download in 6.2, and even that command is typed on your PC, pulling a file the server already generated in Section 4.
Install the client
AmneziaWG has a dedicated Windows app — its interface mirrors the standard WireGuard client but it understands the obfuscation parameters. Download the installer from the project's official repository:
https://github.com/amnezia-vpn/amneziawg-windows-client/releases
The link above is the maintained Windows client's releases page — download the latest .msi/.exe asset from there. This is a page to open in your browser, not a command to paste into a terminal.
Run the installer and step through the setup wizard; the defaults don't need to be changed.
Import the configuration
Copy the client config file from the server to your computer — the easiest way is scp, run in PowerShell on your computer, not the server:

scp root@YOUR_SERVER_IP:~/awg/laptop.conf .In the AmneziaWG app, click "Import tunnel(s) from file", select laptop.conf, and switch on the toggle next to the new tunnel.
Connecting from macOS
Two supported options exist:
- AmneziaWG (Mac App Store): a lightweight client, works on macOS 12 and later. Search "AmneziaWG" in the App Store, install it, then use "Import tunnel(s) from file" and select your .conf file — same workflow as the Windows client.
- AmneziaVPN (full app, macOS 14+): download the .pkg from github.com/amnezia-vpn/amnezia-client/releases/latest if you'd rather use the full-featured Amnezia app instead of the lightweight AmneziaWG-only client.
Copy the client config over first if needed, same as in step 6.2:
scp root@YOUR_SERVER_IP:~/awg/laptop.conf .Connecting from Linux
On a Linux desktop or laptop you have two options:
- GUI: install the full AmneziaVPN desktop client from github.com/amnezia-vpn/amnezia-client/releases, then import the .conf file the same way as on Windows/macOS.
- CLI, using the same amneziawg-tools used on the server (awg / awg-quick):
apt install -y amneziawg
cp laptop.conf /etc/amnezia/amneziawg/awg0.conf
awg-quick up awg0
Run this code to disconnect.
awg-quick down awg0 To bring the tunnel up automatically at login, enable it as a service:
systemctl enable --now awg-quick@awg0Verifying the Connection
With the tunnel active from Section 6, 7, or 8, go back to your own device (not the SSH session) and open any “what's my IP” checker in a browser — the address shown should match your VPS's IP address. To verify from inside the SSH session instead, run awg show on the server and confirm the client's peer shows a recent handshake and non-zero traffic.
Reference:
|
Field |
Value |
|
Address |
YOUR_TUNNEL_IP (the client's address inside the tunnel, e.g. 10.10.8.2/32 — assigned automatically when the client was added in step 4.4) |
|
Endpoint |
YOUR_SERVER_IP:42666 (The external IP address of the server and the UDP port to which the client connects.) |
|
DNS |
8.8.8.8 |
|
Jc / Jmin / Jmax |
number and size of “junk” packets sent before the handshake — may differ between server and client without breaking the connection |
|
S1 / S2 |
size of handshake padding fields — must match byte-for-byte between server and every client |
|
H1–H4 |
packet-type headers that mask the protocol as ordinary traffic — must also match exactly, and must be unique from one another |
Only S1/S2 and H1–H4 need to be identical on both ends of the tunnel; Jc, Jmin, and Jmax are purely about how each side pads its own outgoing junk traffic, so the client and server values can legitimately differ, as they do in the example above.
Conclusion
Following this guide leaves your VPS running its own AmneziaWG server: a WireGuard-compatible protocol with traffic obfuscation that's noticeably harder for DPI systems to tell apart from ordinary UDP traffic than plain WireGuard. The service runs as the systemd unit awg-quick@awg0 and survives a server reboot without any action on your part.
The resulting .conf files and QR codes in ~/awg work not only with the Windows client but can also be imported into the AmneziaWG or Amnezia apps for Android, iOS, macOS, and Linux, as well as Keenetic and OpenWrt routers.
Add new clients at any time by repeating steps 4.4–4.5 (python3 awgcfg.py -a "name", then awgcfg.py -c -q) and restarting the interface with systemctl restart [email protected].
A few habits worth keeping up once the server is running:
- Keep the system patched. Re-run apt update -y && apt upgrade -y periodically, and reboot after kernel upgrades so DKMS rebuilds the amneziawg module against the new kernel.
- Back up ~/awg. It holds every client's private key and the server's own key pair in awg0.conf; losing it means regenerating configs for every device.
- Revoke lost devices promptly. Remove the corresponding [Peer] block from /etc/amnezia/amneziawg/awg0.conf and run systemctl restart [email protected].
If the connection won't come up, check in order:
- the service status (systemctl status [email protected])
- the firewall rules (ufw status — port 42666/udp must be open)
- the DKMS/module status if the interface won't even start (dkms status, lsmod | grep amnezia)
- the list of active peers on the server (awg show)
- that the client config points at the correct external server IP address
Comparing AmneziaWG against other options before committing? See VPN server setup on Linux: PPTP or OpenVPN? and How to set up Wireguard VPN on your server. If you only need a simple proxy rather than a full VPN tunnel, 3proxy configuration on CentOS/ArchLinux is a lighter alternative. For general server hardening once the VPN is live, see Linux Users: Management and Permissions.