For convenient management of your dedicated server, ProfitServer provides remote access via the IPMI protocol.
IPMI (Intelligent Platform Management Interface) is an interface for hardware monitoring, remote management, and server diagnostics. It was developed by a consortium that includes Intel, Dell, HP, and other leading companies. IPMI allows administrators to manage servers regardless of their current state—even if the operating system is not running or the server is powered off.
IPMI Features
- Remotely control server power: turn on, turn off, reboot.
- Get hardware metrics: temperature, voltage, fan speed, disk and memory status
- View and save system error logs (System Event Log, SEL).
- Access to the remote server console, including downloading ISO images and installing the OS.
IPMI works through a special microcontroller on the server's motherboard - BMC (Baseboard Management Controller). BMC has a dedicated network interface or uses a common one with the main network interface.
How to connect to a server via IPMI
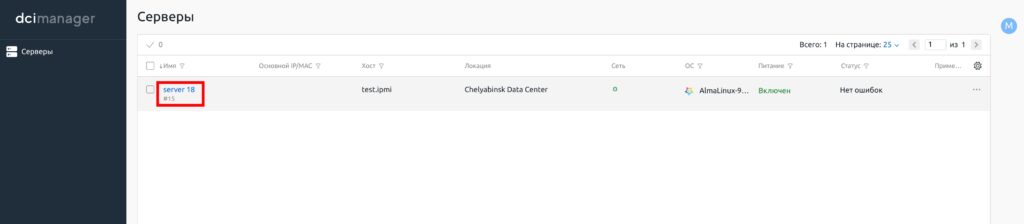
Log in to your personal account in billing, select the Products/Services > Dedicated Servers section, select the required server and click To Panel.

The DCImanager page will open in a new window, you will have access to a table with active servers. To work with the desired server, you need to click on the link with the server name. In the menu that opens, we will be interested in the buttons for connecting to the server terminal Открыть консоль (Open console) and Перейти (Go To) button if you want to log in to IPMI.

Access to IPMI
It is worth noting right away that depending on the server platform manufacturer, the interfaces will differ, but the functionality will be similar.
Examples of manufacturers that support IPMI:
- Supermicro (usually IPMI is built into the BMC and accessible via a separate network port)
- Dell (via iDRAC - extended version of IPMI)
- HP (via iLO)
- Lenovo (via IMM)
In our case, we will consider the iLO interface option from HP
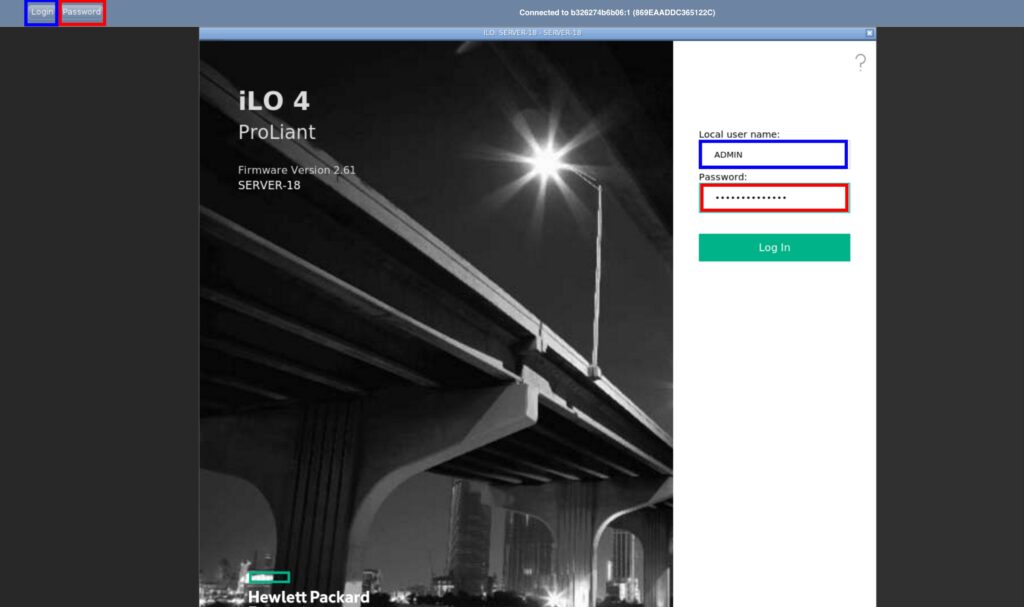
To go to the IPMI interface, select Перейти (Go To) in DCImanager, a new tab will open where you need to log in. To do this, place the cursor in the LOCAL USER NAME field and click the LOGIN button in the left corner, repeat to enter the password, set the course in the PASSWORD input field and click the PASSWORD button in the upper corner. The values set by the system are substituted into the input field and you will find yourself in the IPMI menu.
Basic operations
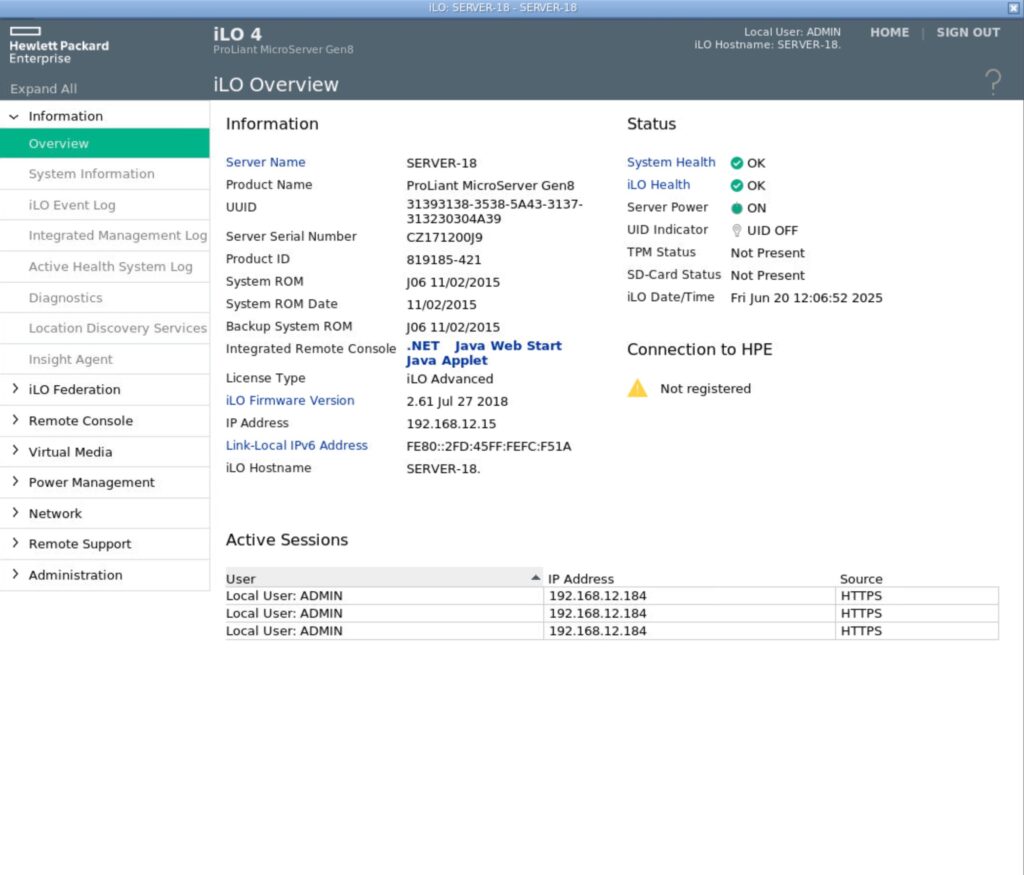
We get to the Information > Overview section. Here the basic information about the server is displayed.
Turning on, turning off and rebooting the server
Go to the Power Management section:
- Momentary Press - short press of the power button.
- Press and Hold - forced shutdown.
- Reset - reboot the server.
- Cold Boot - shutdown and restart.
View hardware status
Go to Information > System Information, where you can:
- Check CPU and chassis temperatures.
- View fan status.
- See voltage levels and power.
- Check RAID controller, disks, memory status.
View logs and current status
Go to the Information section:
- iLO Event Log – event logs.
- Integrated Management Log - IML logs.
- Active Health System Log - AHS (Active Health System) log for a time range.
- Diagnostics - view iLO status. Restart iLO. Send NMI signal.
Viewing and configuring server access
Go to Administration > Access Settings - access session parameters, port settings
Remote access to the server
- Remote Console > Security - setting up remote console locking. This function locks the OS or logs the user out of the system when the remote console session ends or the network connection with iLO is lost.
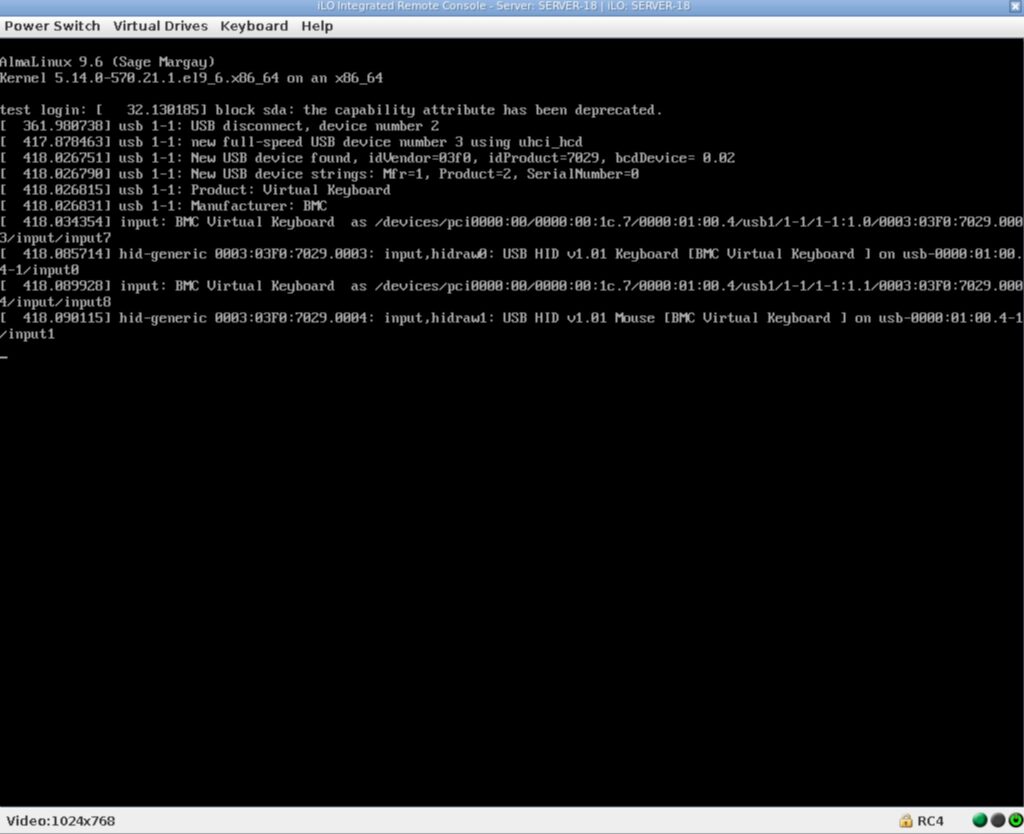
- Remote Console > Applet - the console is launched via a Java applet, after clicking it, a window with an image of the server console opens, this is the main server management interface, you can install various OS from iso images, change BIOS settings, make other settings.

To upload your own OS image, you need to contact technical support to connect your iso image to the server.
Virtual console
There are two ways to open the server's virtual console - via the IPMI menu Remote Console > Applet or via the DCImanager panel, via the Open Console (Открыть Консоль) button in the server properties.
The console controls are concentrated in the menu bar:
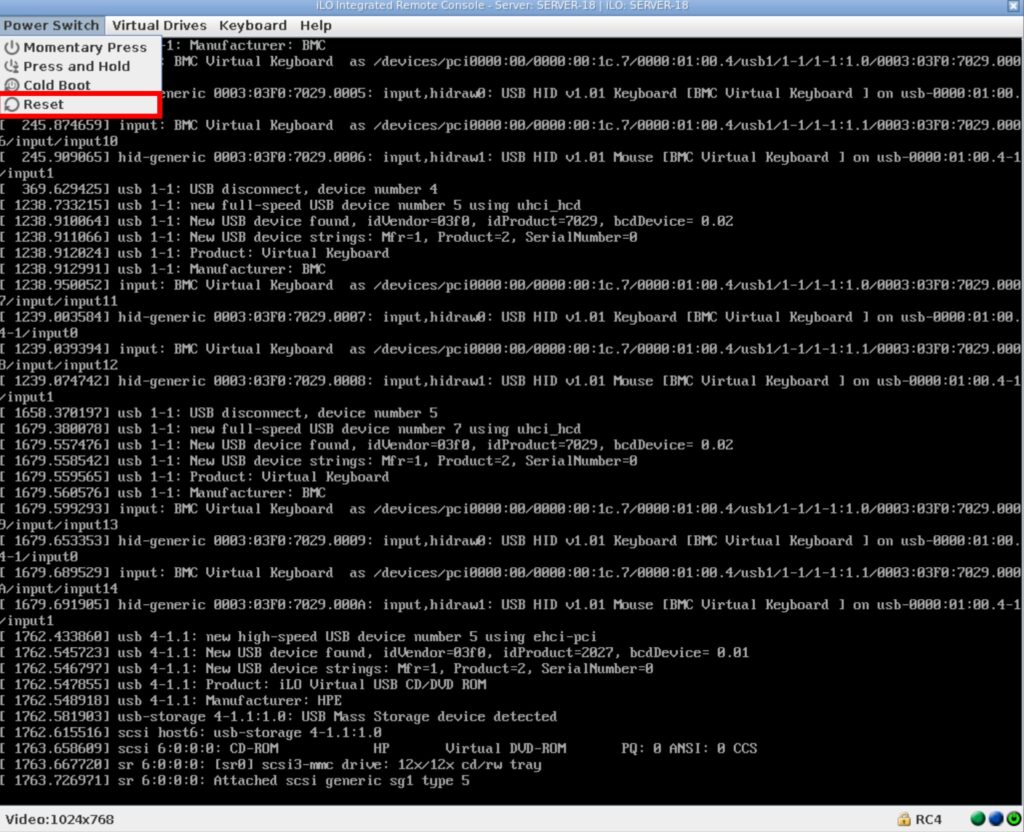
- Power Switch - power off, reboot.
- Virtual Drives - mounting OS images.
- Virtual Keyboard - emulator of pressing combinations of service keys, this can be useful when sending signals to a remote computer.
Installing OS from connected iso image
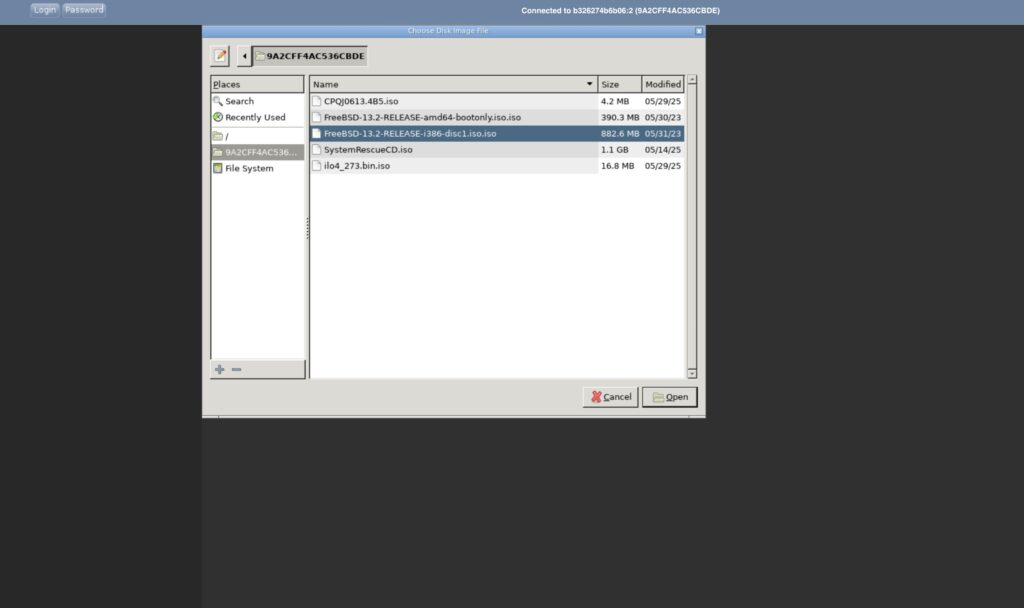
To mount the image, select Virtual Drives > Image File CD/DVD-ROM in the top menu, in the opened explorer window in a specially reserved directory select the image, from the available or previously connected via technical support. If you want to connect the ISO via URL, consider the solution of booting via PXE - this is a technology that allows the computer to boot over the network, bypassing the local hard drive or other media (for example, USB or CD/DVD).

Then in the menu, press Power Switch > Reset, reboot the server, wait for the BIOS to load and select the F11 Boot Menu button, after which you will be directed to the boot menu. Press the appropriate key to select the CD-ROM after the boot menu appears (in this example, it is key 1). Then booting from the mounted image will begin.


IPMI is an indispensable tool for emergency access to the server at the hardware level. Power management, monitoring, virtual media, remote console and even ISO image mounting are all performed without the participation of the main OS. Reliable and secure use of the BMC IP network will help keep the server operational without visiting the data center.