Nowadays, VPN technology becomes more popular. Ordinary users use VPN to safely access the Internet. It also helps get around locally blocked websites and services and protect against possible external malicious behavior. When you’re connecting to a VPN server, there’s a safe tunnel between your computer and the server that cannot be accessed from outside, so the VPN server becomes your Internet access point. There are lots of VPN services out there, both free and paid, but if they don’t work for you for some reason, you can always configure your own VPN server.
To run your oun VPN, you should rent VPS server. There’s different software that lets you create a VPN connection. It differs from each other by operating systems supported and algorithms used. We will take a look at two independent approaches to set up a VPN server. The first one is based on PPTP protocol that is already considered obsolete and not secure but is really easy to configure. The other one employs modern and secure software OpenVPN but requires installing a third-party client application and a more thorough setup process.
In our test environment, we are going to use a virtual server powered by Ubuntu Server 18.04. A firewall is going to be switched off on the server because its configuration deserves a separate article. We will describe the setup process on Windows 10.
Preparation
No matter which VPN server you choose, the Internet access will be set up by integrated means of the operating system. In order to open Internet access through an external service interface you have to allow packet forwarding between the interfaces and configure network address translation.
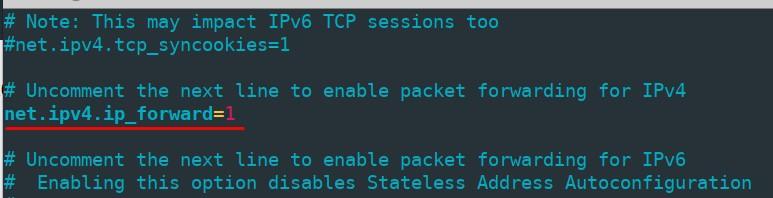
To switch on packet forwarding open the file “/etc/sysctl.conf” and change “net.ipv4.ip_forward” parameter value into 1.
In order to apply changes without rebooting the computer, run the command
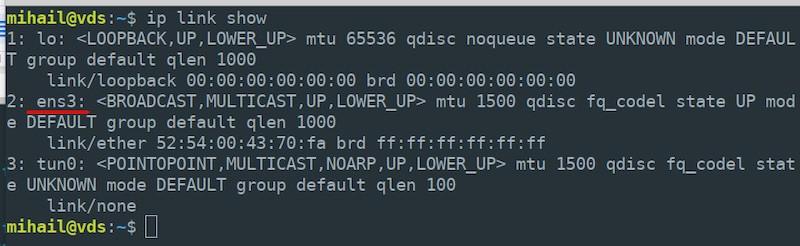
sudo sysctl -p /etc/sysctl.confNetwork address translation is configured by the means of iptables. First, check the name of your external network interface running the command “ip link show” - you will need it at the next step. Our name is “ens3”.
Enable network address translation at your external interface for all local network nodes.
sudo iptables -t nat -A POSTROUTING -o ens3 -j MASQUERADENote that you need to specify the real name of your server’s interface, it can be different from ours.
By default, all rules created by iptables are reset after the server restart. In order to prevent that, use “iptables-persistent” utility. Install the following packet:
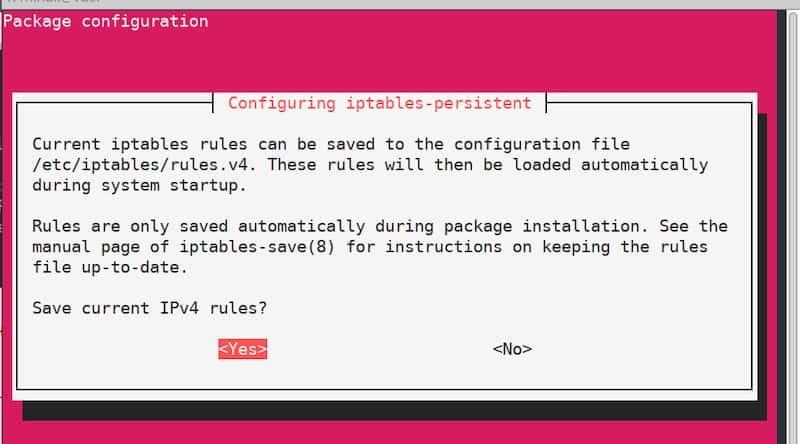
sudo apt install iptables-persistentAt some point during the installation process, you will see a configuration window that will suggest you saving current iptables rules. Since the rules are already defined, just confirm and click “Yes” twice. Since now the rules will be applied automatically after the server restart.
PPTP server
Server configuration
Install the packet:
sudo apt install pptpdAfter the installation ends, open the file “/etc/pptpd.conf” in any text editor and edit it like this:
option /etc/ppp/pptpd-options #path to the settings file
logwtmp #client connections logging mechanism
connections 100 #number of simultaneous connections
localip 172.16.0.1 #the address that will serve as a client gateway
remoteip 172.16.0.2-200 #range of addresses
After that, edit the file “/etc/ppp/pptpd-options”. Most of the parameters are set up by default.
#name of the service for new client records
name pptpd
#restrict obsolete authentication methods
refuse-pap
refuse-chap
refuse-mschap#allow a more secure authentication method
require-mschap-v2#enable encryption
require-mppe-128#specify dns servers for clients (use any available servers)
ms-dns 8.8.8.8
ms-dns 8.8.4.4proxyarp
nodefaultroute
lock
nobsdcomp
novj
novjccomp
nologfdAt the next stage, you will need to create a record for client connections. Let’s say you want to add a user “vpnuser” with password “1” and allow dynamic addressing for him. Open the file “/etc/ppp/chap-secrets” and add the following line with the user’s parameters at the end of the file:
vpnuser pptpd 1 *“pptpd” value is the name of the service that we specified in the file “pptpd-options”. Instead of “*” you can specify a fixed IP address. In the result, the file “chap-secrets” should look like this:

To apply the settings reset the pptpd service and add it to autoloading.
sudo systemctl restart pptpd
sudo systemctl enable pptpd
Server configuration is finished.
Client configuration
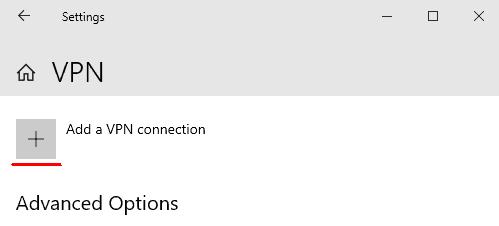
Open “Start” - “Settings” - “Network & Internet” - “VPN” and click “Add a VPN connection”
Enter the connection parameters in the window opened and click “Save”
- VPN provider: “Windows (built-in)”
- Connection name: “vpn_connect” (you can choose any name)
- Server name or address: (specify the external IP address of the server)
- VPN type: “Auto”
- Type of sign-in info: “User name and password”
- User name: vpnuser (name specified in the “chap-secrets” file on the server)
- Password: 1 (as in the “chap-secrets” file)
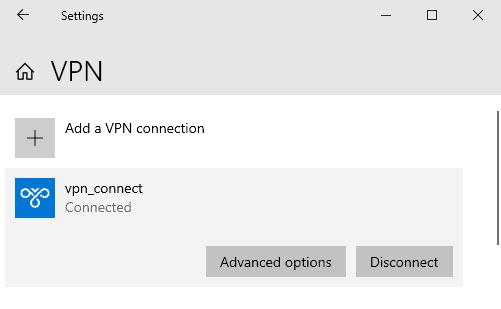
After saving parameters, you will see the new VPN connection in the window. Left-click the connection and select “Connect”. In the case of a successful connection, you will see “Connected” status.
In the Options, you will find internal addresses of the client and the server. Field “Destination address” displays the external server address.
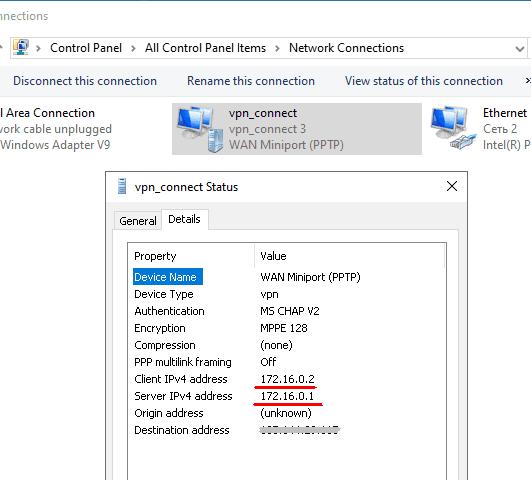
When connected, the internal IP address of the server, 172.16.0.1 in our case, becomes the default gateway for all outgoing packets.
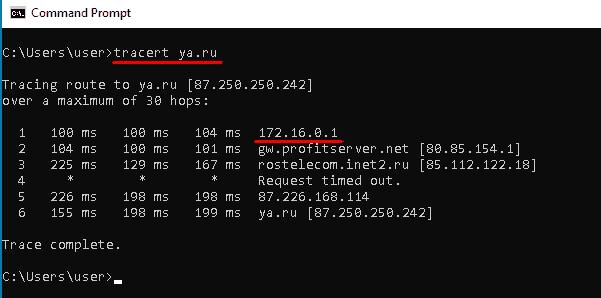
Using any online service you can make sure that the external IP address of the computer is now the same as your VPN server’s IP address.
OpenVPN server
Server configuration
Let’s promote the permissions level of the current user because for our further configuration we will need root access.
sudo -sInstall all the necessary packets. We will need “Easy-RSA” packet to manage encryption keys.
apt install openvpn easy-rsa iptables-persistentAllow incoming connections on port 1194 via UDP protocol and apply iptables rules.
sudo iptables -I INPUT -p udp --dport 1194 -j ACCEPT

sudo netfilter-persistent save
Create a directory with copied files from the “Easy-RSA” package and navigate into it.
make-cadir ~/openvpn

cd ~/openvpn
Generate Public Key Infrastructure (PKI).
./easyrsa init-pkiGenerate the Certificate Authority (CA) root certificate.
./easyrsa build-caDuring the creation process, you'll be prompted to set and remember a password. You'll also need to answer questions and enter information about the key owner. You can leave the default values provided in square brackets. Press "Enter" to finalize the input.
Generate a private key and a certificate request. As an argument, specify an arbitrary name; in our case, it's “vpn-server”.
./easyrsa gen-req vpn-server nopassLeave the Common Name value as default.
Sign the generated server certificate request.
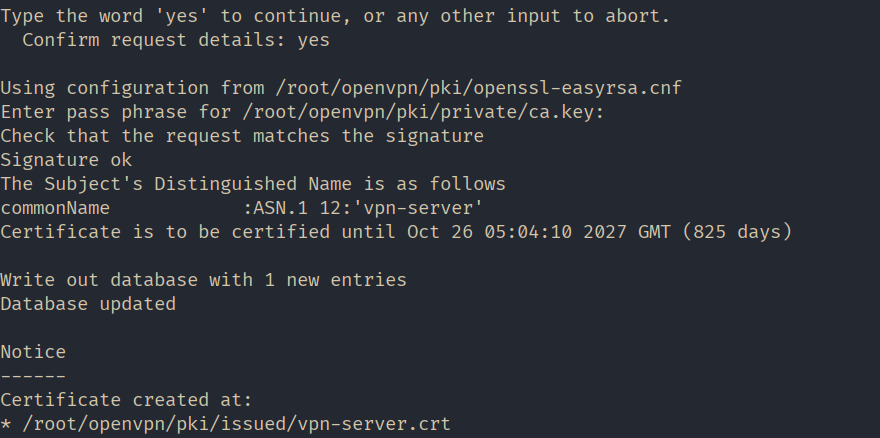
./easyrsa sign-req server vpn-serverAt this step, answer "yes" to confirm the signature, then enter the password that was created during the root certificate generation.
Generate Diffie-Hellman parameters. These parameters are used for secure key exchange between the server and the client.
./easyrsa gen-dh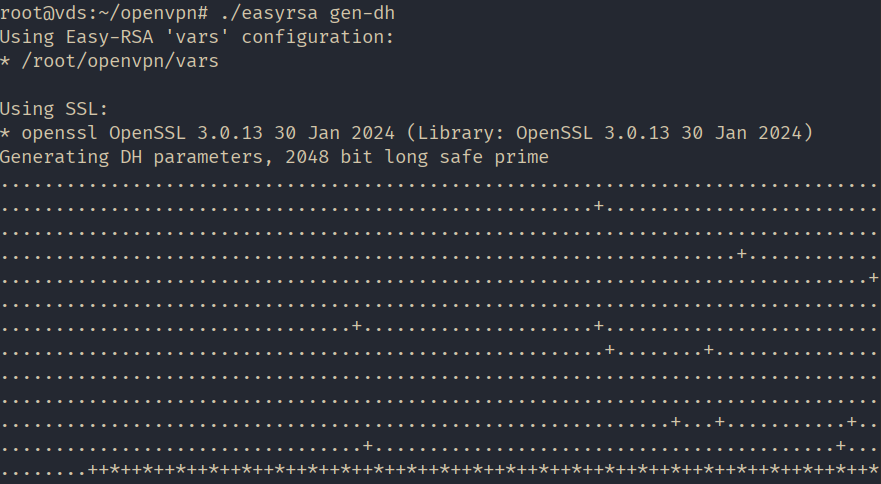
All necessary files have been generated. Let's create a "keys" folder in the OpenVPN working directory to store the keys and copy the created files there.
mkdir /etc/openvpn/keys

sudo cp pki/ca.crt pki/issued/vpn-server.crt pki/private/vpn-server.key pki/dh.pem /etc/openvpn/keys
Configure NAT using iptables rules. Create a file named nat and open it for editing in the /etc/openvpn/ directory.
#!/bin/sh

# Reset firewall settings
iptables -F
iptables -X
iptables -t nat -F
iptables -t nat -X

# (eth0 in our case, may vary)
iptables -A INPUT -i eth0 -m state --state ESTABLISHED,RELATED -j ACCEPT

# (eth0 in our case, may vary)
iptables -A INPUT -i eth0 -p tcp --dport 22 -j ACCEPT

# Allow OpenVPN connections (eth0 in our case, may vary)
iptables -A INPUT -i eth0 -p udp --dport 1194 -j ACCEPT

iptables -A INPUT -i tun0 -j ACCEPT

# (eth0 in our case, may vary):
iptables -A FORWARD -i eth0 -o tun0 -j ACCEPT
iptables -A FORWARD -i tun0 -o eth0 -j ACCEPT

# (eth0 in our case, may vary)
iptables -A FORWARD -i eth0 -o tun0 -m state --state ESTABLISHED,RELATED -j ACCEPT

# Enable masquerading for the local network (eth0 in our case, may vary)
iptables -t nat -A POSTROUTING -o eth0 -s 10.8.0.0/24 -j MASQUERADE

# Deny incoming connections from outside
iptables -A INPUT -i eth0 -j DROP

# Deny transit traffic from outside (eth0 in our case, may vary)
iptables -A FORWARD -i eth0 -o tun0 -j DROP

sudo netfilter-persistent save
Save the file and make it executable.
sudo chmod 755 /etc/openvpn/natCopy the server configuration template.
cp /usr/share/doc/openvpn/examples/sample-config-files/server.conf /etc/openvpn/Open the file “/etc/openvpn/server.conf” for editing, make sure it contains the following lines, and edit them if needed:
#Port, protocol, and interface

port 1194

proto udp

dev tun
#Path to the encryption keys
ca /etc/openvpn/keys/ca.crt
cert /etc/openvpn/keys/vpn-server.crt
key /etc/openvpn/keys/vpn-server.key
dh /etc/openvpn/keys/dh.pem
#SHA256 Hashing Algorithm

auth SHA256
#Switching off additional encryption
#tls-auth ta.key 0#Network parameters
server 10.8.0.0 255.255.255.0
ifconfig-pool-persist /var/log/openvpn/ipp.txt
push "redirect-gateway def1 bypass-dhcp"
push "dhcp-option DNS 8.8.8.8"
push "dhcp-option DNS 8.8.4.4"#Ping every 10 seconds to check the connection.
keepalive 10 120#Set up AES-256 encryption for the tunnel.
cipher AES-256-GCM#Demoting the service OpenVPN after launch
user nobody
group nogroup#Switching on parameters saving after reboot
persist-key
persist-tun#Set log verbosity
verb 3#Redirecting logs
log-append /var/log/openvpn/openvpn.log#Script the rule installation launch.
up /etc/openvpn/natEnable traffic forwarding on the server.
sudo sysctl -w net.ipv4.ip_forward=1

echo 'net.ipv4.ip_forward=1' | sudo tee -a /etc/sysctl.conf
Start OpenVPN to apply the configuration.
systemctl restart openvpn@serverThe server configuration is finished!
Client configuration
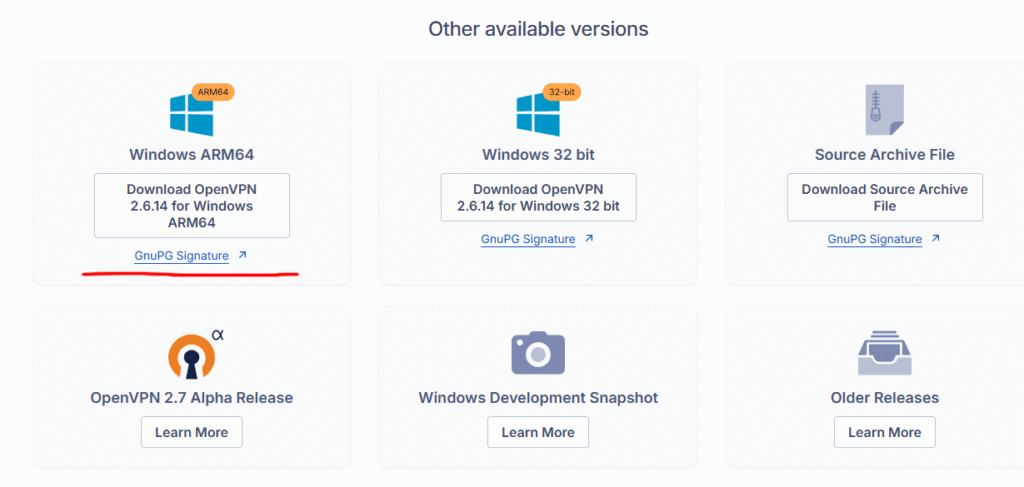
Go to the official website of OpenVPN “https://openvpn.net”, go to the “COMUNITY” section.

Scroll down and download the installer for your operating system version. In our case, it's Windows 11 ARM64.
Install the application leaving all parameters by default.
At the next stage you will need to prepare the following file on the server and transfer them to the client computer:
- public and private keys;
- copy of the certification center key;
- config file template.
Connect to the server, elevate privileges, and navigate to our created directory "~/openvpn".
sudo -s

cd ~/openvpn
Generate a private key and a certificate request for the client. As an argument, specify an arbitrary name; in our case, it's “client1”.
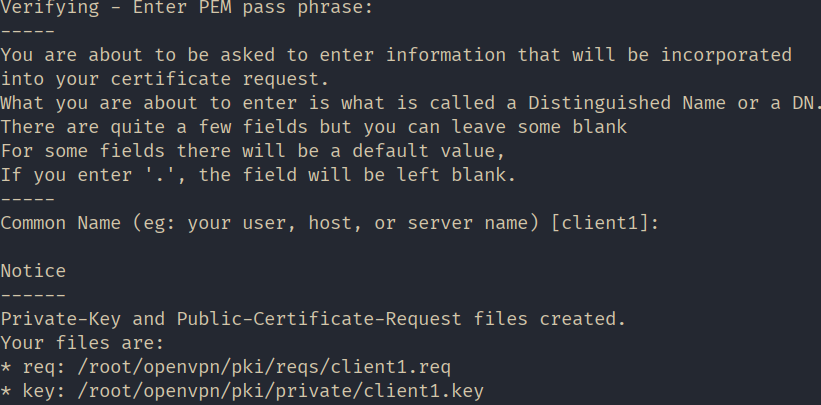
./easyrsa gen-req client1 nopassEnter the password we set when creating the root certificate and leave the Common Name value as default.
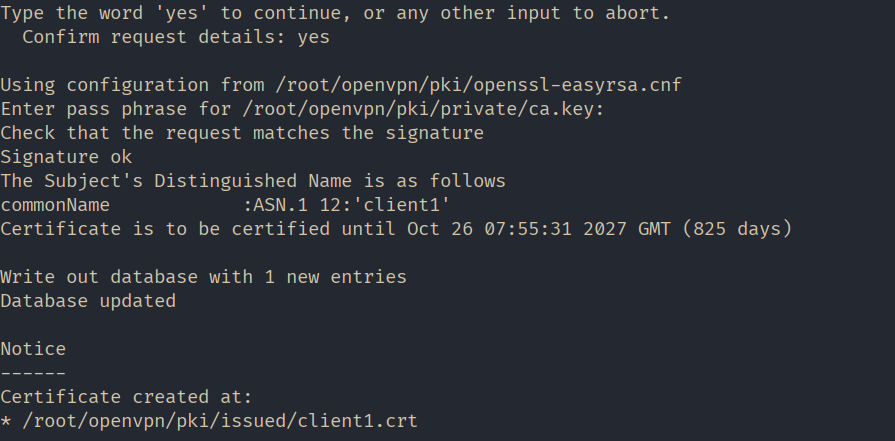
Sign the generated client certificate request.
./easyrsa sign-req client client1At this step, answer "yes" to confirm the signature, then enter the password that was created during the root certificate generation.
For convenience, let's create a folder named 'client1' in the home directory and copy all files intended for transfer to the client computer into it.
mkdir ~/client1

cp pki/issued/client1.crt pki/private/client1.key pki/ca.crt ~/client1/
Copy the client config file template to the same directory. Change the file extension to “.ovpn” while copying.
cp /usr/share/doc/openvpn/examples/sample-config-files/client.conf ~/client1/client.ovpnChange the owner of the directory and all the files “~/client1/” to be able to distribute them to the client. Let’s make “mihail” the owner in our case.
chown -R mihail:mihail ~/client1Go to the client computer and copy the content of the “~/client1/” folder. You can do that with the help of “PSCP” utility, that goes with Putty.
PSCP -r mihail@[IP_сервера]:/home/mihail/client1 c:\client1You can store key files “ca.crt”, “client1.crt”, “client1.key” wherever you want. In our case, they are in this folder “c:\Program Files\OpenVPN\keys”, and we mode the config file “client.ovpn” into the “c:\Program Files\OpenVPN\config” directory.
Now let’s get to configuring the client. Open the file “c:\Program Files\OpenVPN\config\client.ovpn” in a text editor and edit the following lines:
#announce that this is the client

client
#interface and protocol just like on the server
dev tun
proto udp#IP address of the server and port
remote ip_address 1194#saving parameters after reload
persist-key
persist-tun#key paths
ca “c:\\Program Files\\OpenVPN\\keys\\ca.cert”
cert “c:\\Program Files\\OpenVPN\\keys\\client1.crt”
key “c:\\Program Files\\OpenVPN\\keys\\client1.key”#enable server verification
remote-cert-tls server#disable extra encryption
#tls-auth ta.key 1
cipher AES-256-CBC
auth-nocache
verb 3Leave the rest untouched.
Save the file and launch the client application “OpenVPN GUI”.
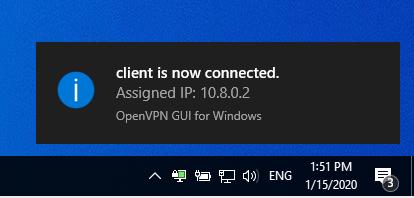
Right-click on the app icon in the taskbar and choose “Connect”. If the connection is successful the icon will turn green.
Use any online service to make sure your public IP address has changed and is now the same as the server’s IP address.