This simple guide will help all the owners of virtual or dedicated servers create domain in the DNSmanager panel on the ProfitServer platform. Even if you don`t have ISPmanager panel, you will be able to connect:
- free domain name like: domainname.pserver.space
- any domain registered here on ProfitServer
- any domain registered on any other service
After you order a virtual or dedicated server, you will receive an e-mail with access details to your server. This e-mail will look like this::
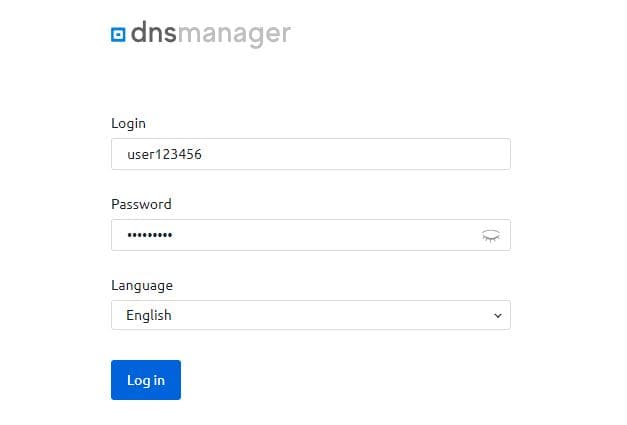
- DNSmanager - control panel of DNS
- Link: https://dns.profitserver.net/
- User: user*******
- Password: **********
Step-by-Step guide to create domain name in DNSmanager control panel
1. Log in to DNSmanager panel using access details from your e-mail:
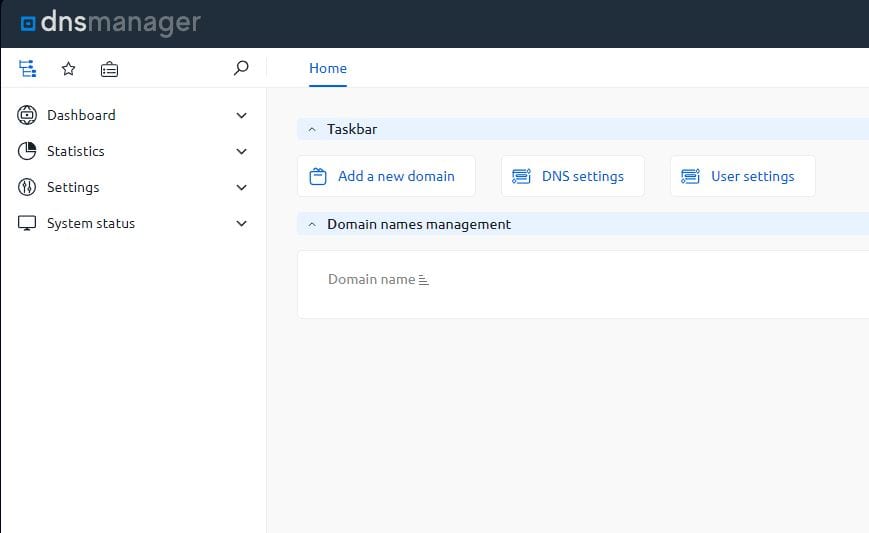
2. After autorization you will see the DNSmanager panel screen:
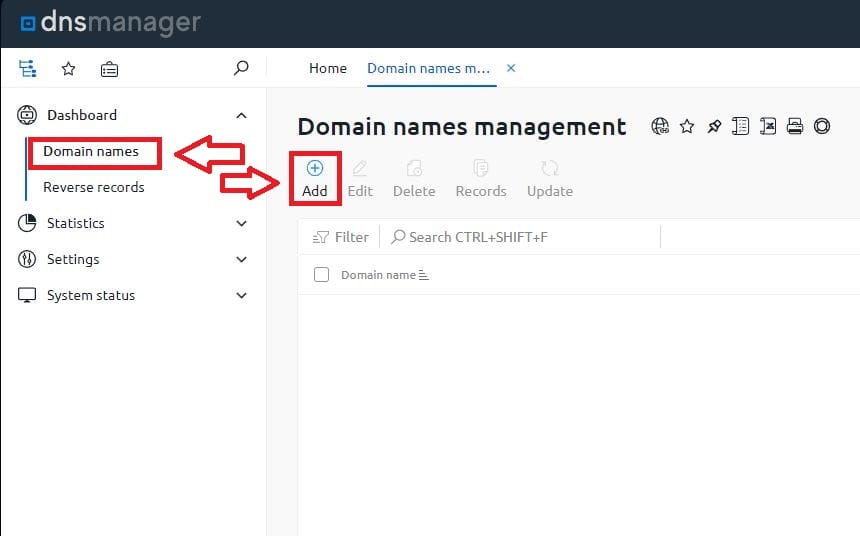
3. Open "Dashboard" - "Domain names" and "Add":
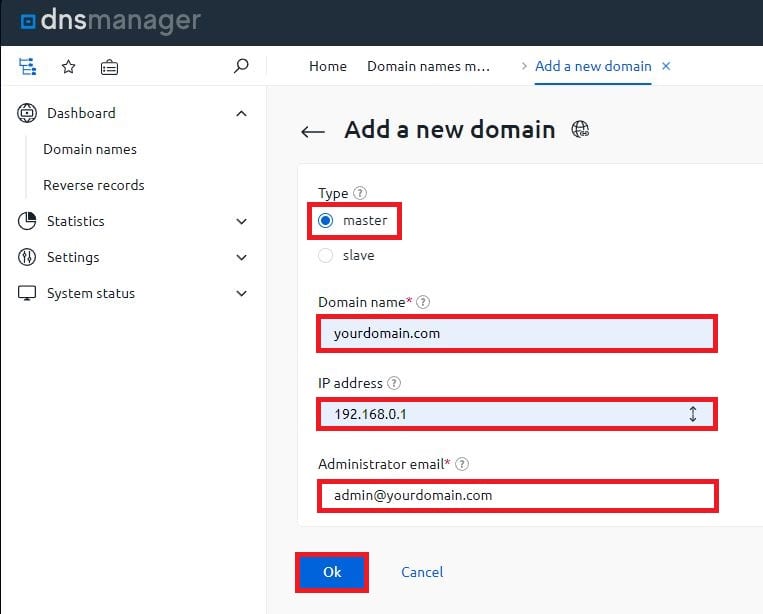
4. Fill the setup data
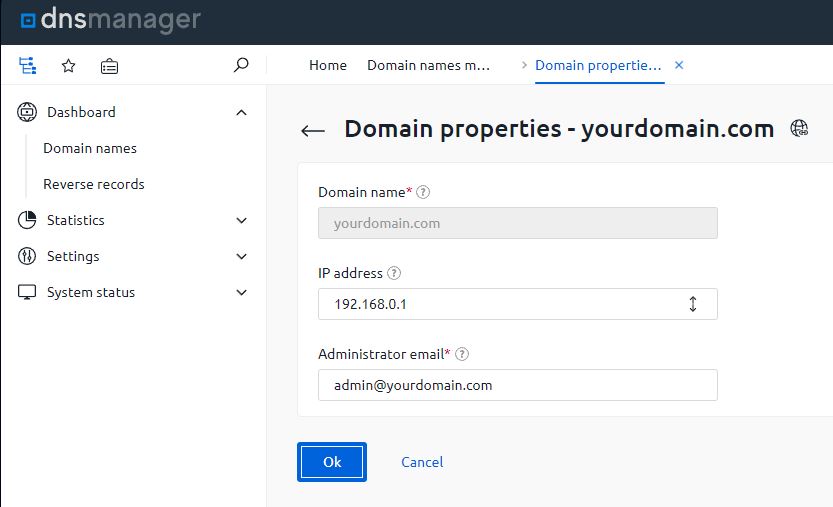
- Type — master
- Domain name — your domain name you wish to connect
- IP address — your server's exact IP address
- Administrator email — your e-mail
Note: Arbitrary data is used in the example, be sure to specify your real ones:
5. After that your domain will appear in the list:
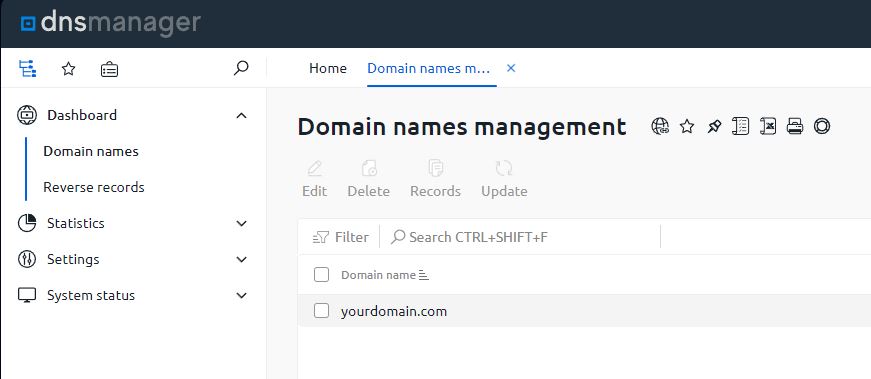
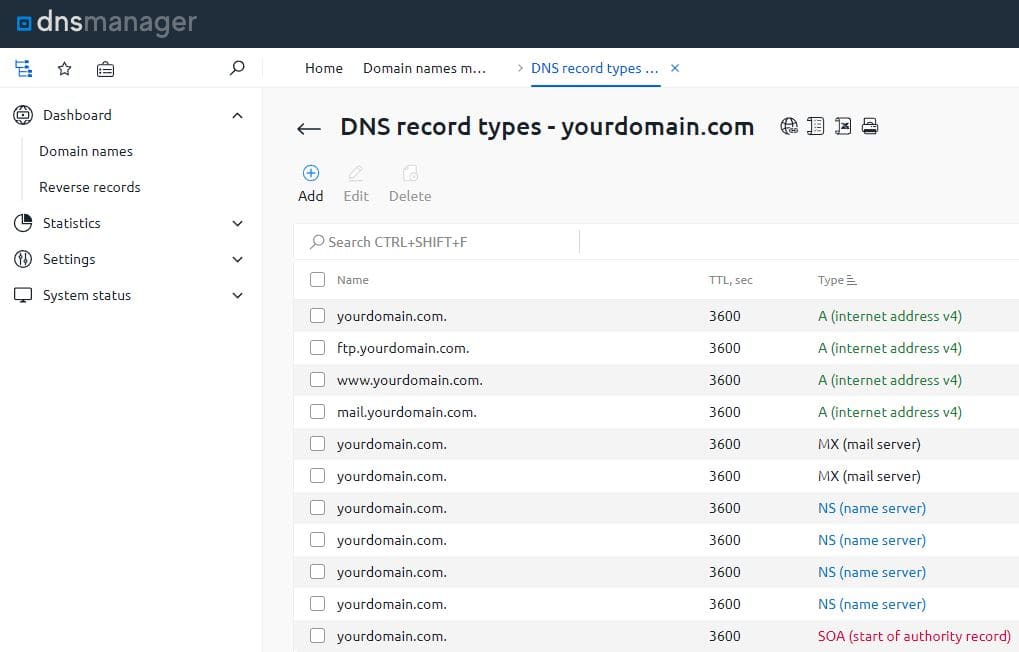
6. In the future, you can always change the data, DNS records, as well as delete the domain. For this, press the corresponding button in the panel. The parameters and record management look as follows:
7. Now your domain is connected to your server.