In this article, we will detail the process of installing the LAMP stack on a server running the CentOS Stream operating system. You will learn how to configure each component step-by-step and verify the functionality of the installed stack. For users working with Debian/Ubuntu distributions, a similar LAMP installation process is described in another of our articles.
The LAMP stack consists of a set of software, including the Linux operating system, the Apache web server, the MySQL or MariaDB database management system, and the PHP scripting language. These components work together to create a powerful and flexible platform for deploying web applications and websites.
Server Preparation
Before starting the installation, a series of preparatory steps must be taken.
Switching to the Superuser
First of all, you need to gain superuser (root) privileges, as most commands required for server setup need elevated permissions. Enter the following command to switch to the root user:
su -System Update
Next, it is recommended to update all installed packages to the latest versions. To update, run the command:
dnf update -yFirewall Configuration
To ensure the security of your server, you need to configure access rules. CentOS Stream uses firewalld by default as the rule management system. Ensure firewalld is installed and running:
systemctl status firewalldThen, open the ports that will be used by the LAMP stack:
- HTTP (port 80) for website access;
- HTTPS (port 443) for secure website access;
- MySQL (port 3306) for database access (if remote connection is required).
Use the following commands to open these ports:
firewall-cmd --permanent --add-service=http
firewall-cmd --permanent --add-service=https
firewall-cmd --permanent --add-port=3306/tcp
Also, add a rule for SSH connection:
firewall-cmd --permanent --add-port=22/tcpAfter adding all necessary rules, reload the firewall settings:
firewall-cmd --reloadEnsure the firewall is working correctly. Run the following command to view all rules:
firewall-cmd --list-all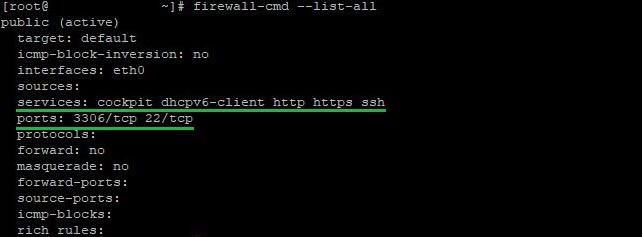
Apache Installation
To install Apache, use the DNF package manager. If you only need the basic version of Apache, use the following command:
dnf install httpd -yIn addition to the basic installation of Apache, you can also add various utilities and modules to extend functionality and enhance the security of the web server. The syntax of this command is:
dnf install additional_packages –yTo install the service along with additional packages, the command looks like this:
dnf install httpd additional_packages -yRefer to the official documentation to familiarize yourself with the available utilities and modules.
After installing Apache, start it and add it to startup:
systemctl start httpd
systemctl enable httpd
Check the status of the service using the command:
systemctl status httpd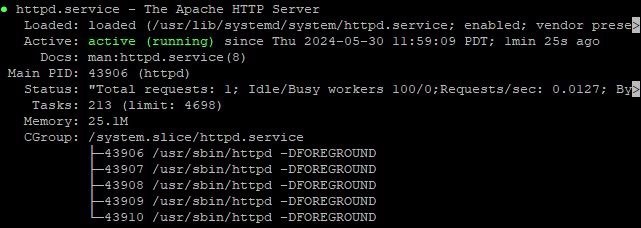
At this stage, you can open a web browser and enter the server's IP address in the address bar. You should see the Apache welcome page, indicating a successful installation:
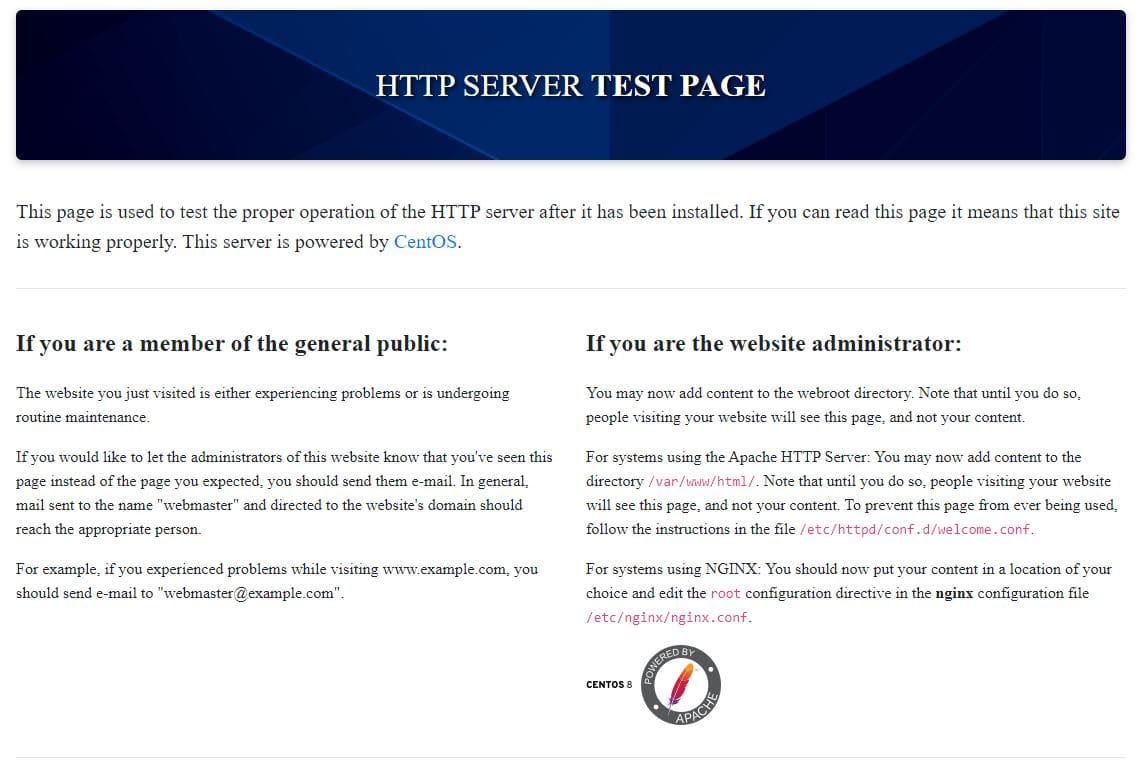
By default, Apache on CentOS is located in the /etc/httpd directory. Inside it are various subdirectories and files used for server configuration and management.
Website files, such as HTML, CSS, JavaScript, should be placed in the /var/www/html directory. All files in this directory will be accessible at your site's address.
MySQL Installation
In this section, we will look at the process of installing and configuring MariaDB on a CentOS Stream server. MariaDB is a fork of MySQL that maintains compatibility with MySQL but offers improved performance, enhanced features, and an active developer community. To install the tool, use the command:
dnf install mariadb-server mariadb -yAfter installation, start the service and enable it to start on system boot:
systemctl start mariadb
systemctl enable mariadb
To ensure that the MariaDB service is running correctly, use the following command:
systemctl status mariadb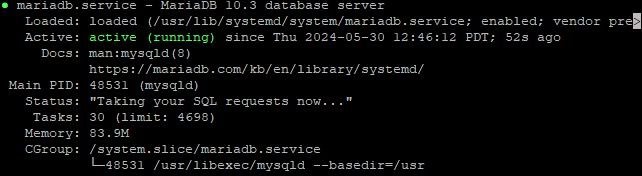
MariaDB provides a security setup script that allows you to remove unsafe default settings and protect the database. Run it:
sudo mysql_secure_installationDuring the script execution, you will be prompted to perform several steps:
- Set a password for the root user (if not already set);
- Remove anonymous users;
- Disallow remote login as root;
- Remove the test database and access to it;
- Reload privilege tables to apply changes.
It is recommended to answer affirmatively (y) at all stages.
After completing the initial security setup, you can connect to MariaDB. To do this, run the command:
mysql -u root -pTo ensure MariaDB is working correctly, it is recommended to create a test database. Execute the following commands in the MariaDB console:
CREATE DATABASE testdb;
USE testdb;
CREATE TABLE test_table (
    id INT AUTO_INCREMENT PRIMARY KEY,
    name VARCHAR(100) NOT NULL
);
INSERT INTO test_table (name) VALUES ('example data');
SELECT * FROM test_table;
These commands will create a new database testdb, a table test_table, and add one record. They will then display the contents of the table for verification:

To exit the shell, use the command:
exitPHP Installation
After installing Apache and MySQL, the next step is to install and configure PHP, which is responsible for processing dynamic web pages. Similar to Apache, you can perform a basic installation of PHP as well as add the necessary additional modules. For a basic installation, use the command:
dnf install phpHowever, in this form, the tool is rarely installed. More often, the installation occurs immediately with additional modules. Let's install with some important modules:
dnf install php php-cli php-mysqlnd php-json php-gd php-ldap php-odbc php-pdo php-opcache php-pear php-xml php-xmlrpc php-mbstring php-snmp php-soap php-zip –yRefer to the official documentation for a full list of available modules. To check the installed modules, use the command:
php -mTo check the installed version of PHP, use the command:
php -v
The main PHP configuration file is located at /etc/php.ini. Open this file in a text editor:
vim /etc/php.iniMake the necessary changes, for example, set the correct time zone using the date.timezone directive and adjust the upload file sizes using the upload_max_filesize and post_max_size directives. If you have not previously worked with console text editors, we have prepared an article to help you understand the basics of working with vim.
After installing the tool and making any changes to the configuration file, restart the Apache service:
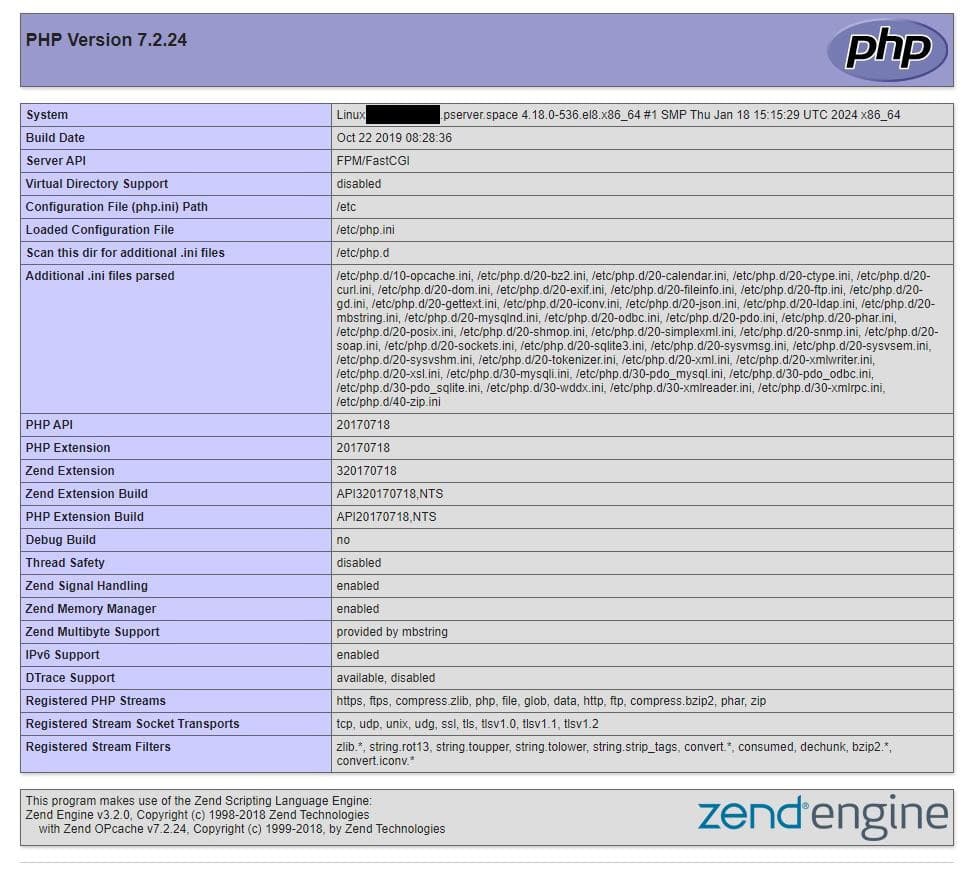
systemctl restart httpdTo check the functionality, create a simple script that will display information about the PHP version and current settings. Create a file info.php in the web server root directory /var/www/html with the following content:
<?php
phpinfo();
?>
Open a web browser and enter the server's URL followed by the test script file name. For example:
http://your_server_ip/info.phpIf everything is set up correctly, you will see detailed information about the PHP version, settings, supported modules, and more:
Conclusion
Installing the LAMP stack on a CentOS Stream server is an important step for creating a reliable web server. By following the instructions, you have learned how to configure Apache, MySQL, and PHP, which are necessary for dynamic websites. This stack opens up many possibilities for web development, and further study and optimization will help you improve the performance and reliability of your server.