In order to save performance, disk space, and network traffic, it makes sense to disable Windows update on low-power servers. However, we strongly advise you not to do this, as the server remains less secure without OS updates.
If you decide to disable Windows update, make sure that all the server roles and components you need for working (such as RDS or .NETFramework) are installed, because installation of some roles and features becomes impossible after the update disabling.
There are two ways to disable Windows Server 2012 updates:
- Disable automatic system updates receipt from the Internet
- Completely system update service disabling - completely disabling the Update API, which makes it impossible to install even local updates and components (for example .NETFramework)
Disable Windows update from the Internet
Receiving updates from the Internet is governed by the “Automatic Update Settings” policy. To change the parameter of this policy, go to the “Local Group Policy Editor” toolbar (also called as “gpedit.msc”).
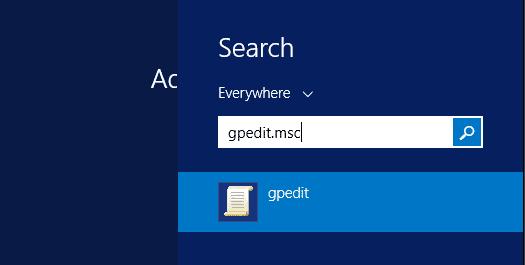
1. Click 'Start' and type “gpedit.msc” in the search field. In the search results, click on the found app.
2. On the left side of the window appeared, on the left side, go to “Computer Configuration” -'Administrative Templates” - “Windows Components” - “Windows Update”
3. In the right part of the window, find the "Automatic Update Settings" policy and double click to open its properties
4. Change the value to 'Disabled' and click`Apply'
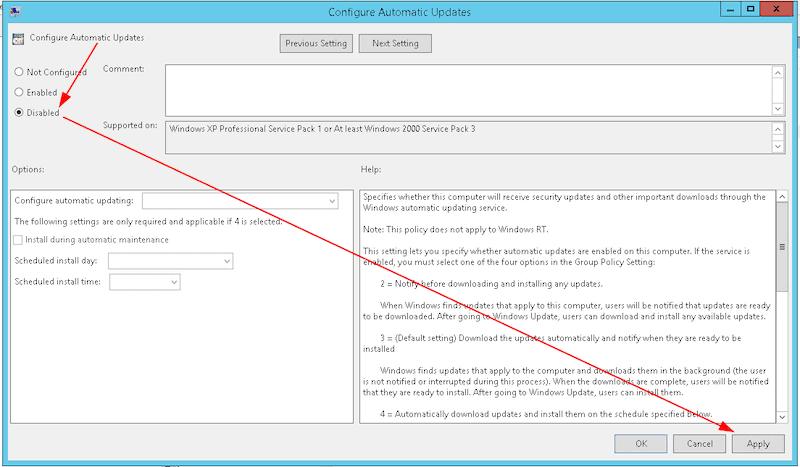
After setting this policy, system updates will not be received automatically from the Internet.
Complete Update API disabling
Any work regarding updates in the system is carried out via the “Windows Update” service (aka `wuauserv`), any work with updates will be impossible by disabling this service.
Use of the graphical interface
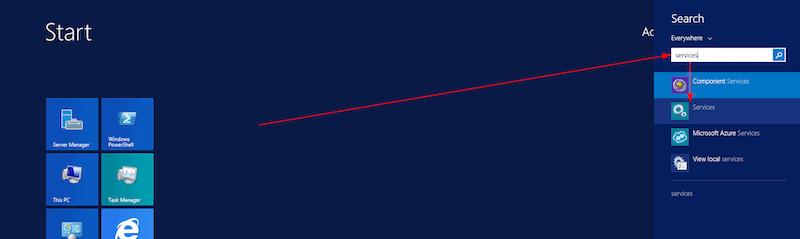
1. Enter the Services toolbar. To do this, click the "Start" button, start typing “services” in the search field, then click "Services" in the result field
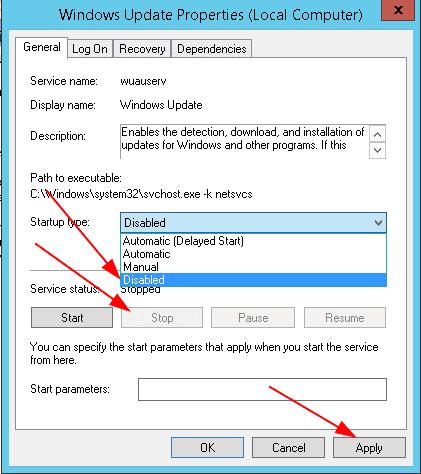
2. In the list of services, find the Windows Update service and double click to open its properties.
3. In the appeared window, click “Disable” and change the startup type to “Disabled”, then click “Apply”
Via the command prompt
- Open the command prompt
- Type
sc stop wuauservpress ENTER - Type
sc config wuauserv start=disabledand press ENTER
After the completed operations, the update API will be disabled.